Project Files
Google Drive Connection for Project Files
 We are excited to offer Google Drive connection for desktop syncing and collaborative editing of your Project Files. Connecting your project is a fast and easy process, which creates a dedicated remote folder shared between all joining project team members and synced with your local Project Files directory. Team members use their own Google accounts to connect and may use Google Drive syncing apps available for various platforms and devices. In addition, individual project files may be exported to Google Docs, a suite of editing tools that makes working together better.
- What is Google Drive?
- Connecting your project with Google Drive
- After you connect
- Sync between remote and local files
- Collaborative Editing via Google
What is Google Drive?
Google Drive is a free service that lets you store all your files including documents, photos, videos and Google Docs online and access them anywhere. With Google Drive, you can create, share and keep all your stuff in one place.

Google Drive is available for:
- PC and Mac
- Chrome OS
- iPhone and iPad
- Android devices
Learn more about Google Drive ›
Connecting your project with Google Drive
Project Files web browser now includes a Connect button showing remote services available for your project:
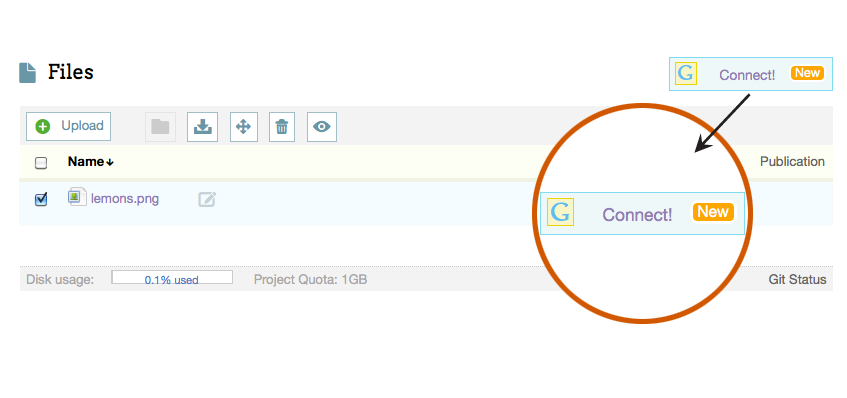
Project creator establishes the initial connection to Google Drive. For a project that is not yet connected, only Project Creator will see the Connect button. After the initial connection is established, all other project members will also see the button to connect and may follow the same connection process.
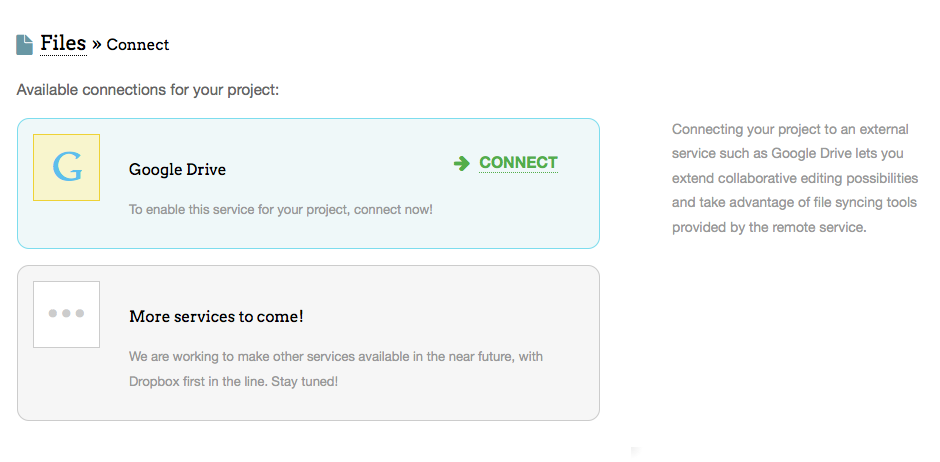
Clicking the Connect button opens Connections screen describing available services. To proceed with the connection, you follow the green Connect link:
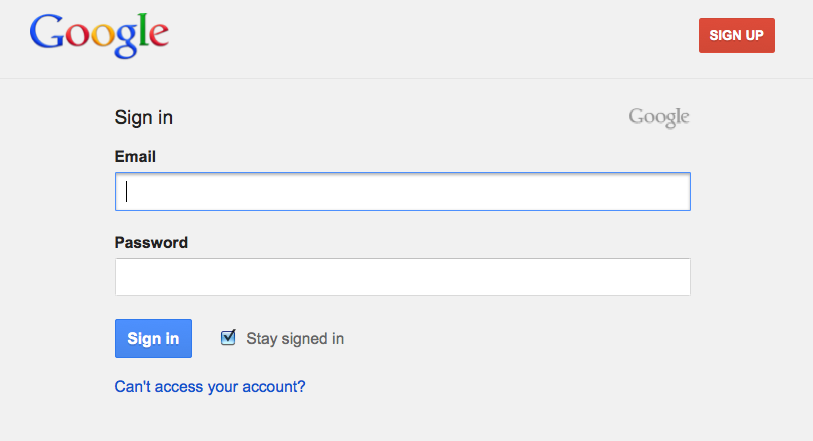
When connecting to Google Drive, you need to be logged into Google with your preferred gmail account.
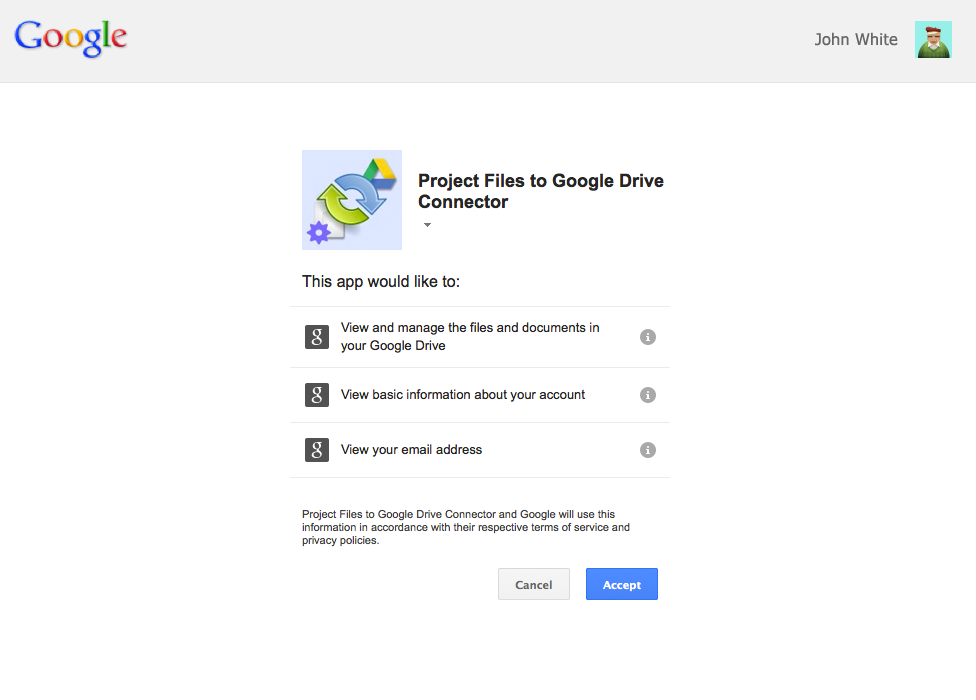
As soon as you login To Google, you will be presented with the Request for Permission screen. Our connector app needs your permission to view and manage files and documents in your Google Drive as well as view your basic Google account information including the email address and Google screen name.
We only manage files stored in the dedicated shared remote folder that we create for your Project. Your Google screen name and email address are required to properly record file revision history.
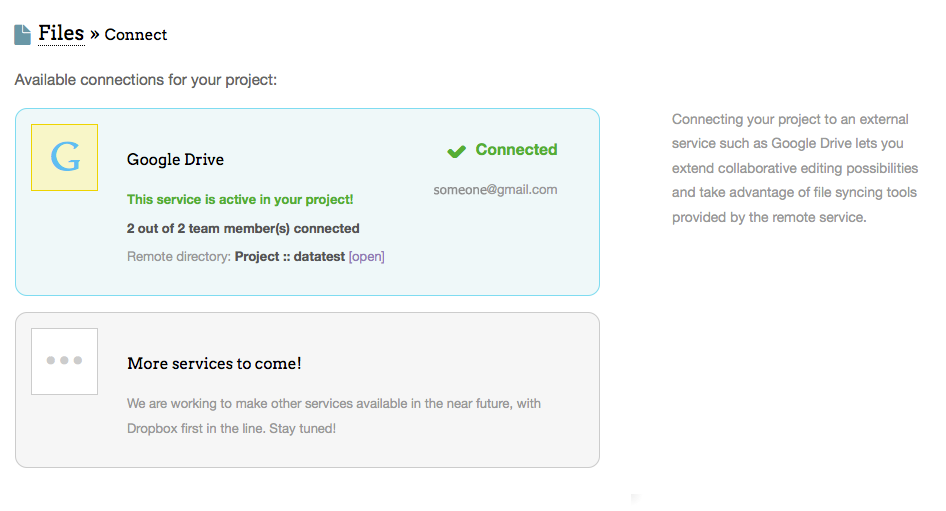
Upon successful connection, you are returned to the Connections screen in your project, which now shows connection details and includes a direct link to the shared remote folder in Google Drive:
After you connect
Project Creator
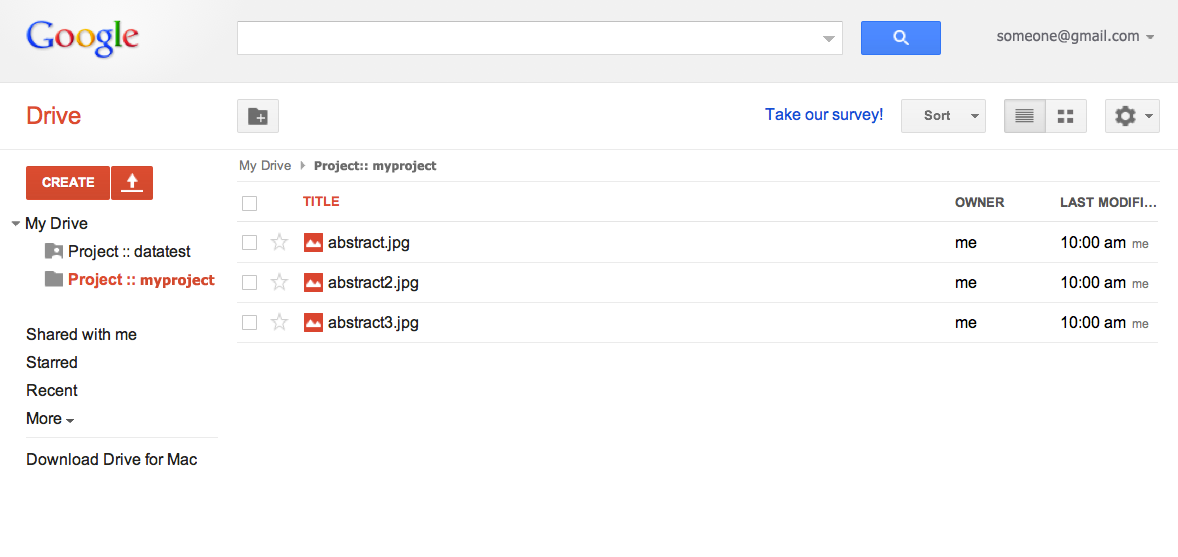
If you are the Project Creator, you should now see a new folder created in the root of your Google Drive. The folder will have your project alias in its name, e.g. Project:: myproject. If you had any files in your project already, they would be copied to the remote directory during first sync.
Other project members
For all project members that connect after project creator, the new remote folder will appear under "Shared with me" directory in your Google Drive.
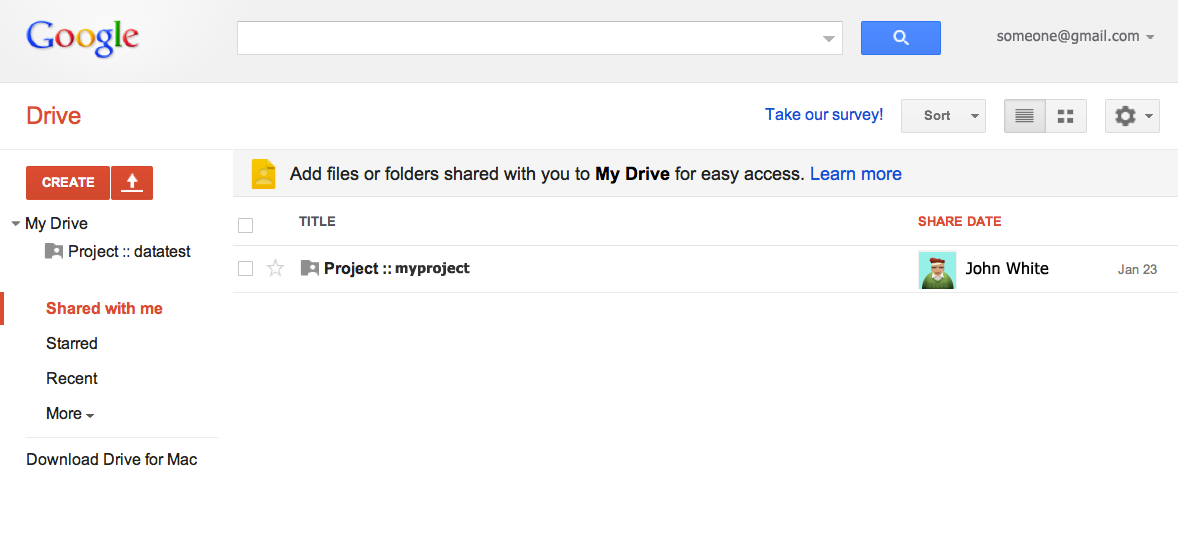
Unless something shared with you is stored in My Drive, it won’t sync. Here’s how to add the project folder from Shared with me to My Drive:
- Click Shared with me.
- Select the project folder.
- Click the Add to My Drive button. The contents of the project folder will automatically sync to the Google Drive folder on your computer.
Desktop Google Drive app
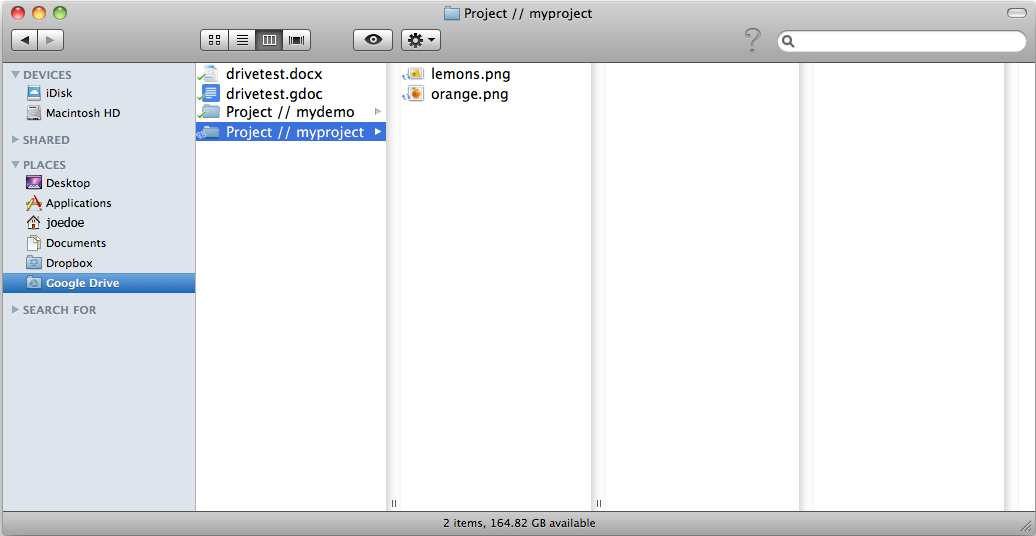
To access synced project files right from your desktop, you can download Google Drive. It's free and installs in seconds. Here is an example how your Google Drive folder may be accessed on a mac:
Project Files browser
Now that the project is connected to Google Drive, the Project Files browser includes a few extra options.
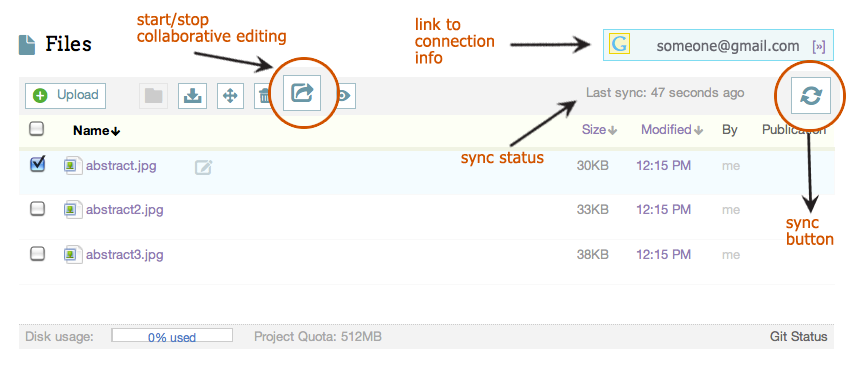
The Sync button initiates a sync between local and remote files. Sync status is then shown to the left of the Sync button.
Files of certain types may be converted to Google format and back by clicking on the start/stop Collaborative editing button.
Sync between remote and local files
Sync of local and remote project files happens automatically every hour, after each local change, or may be initiated manually by clicking on the Sync button in the Project Files browser.
Sync status will be shown to the left of the Sync button and will tell you the progress of current sync or time since last sync operation.
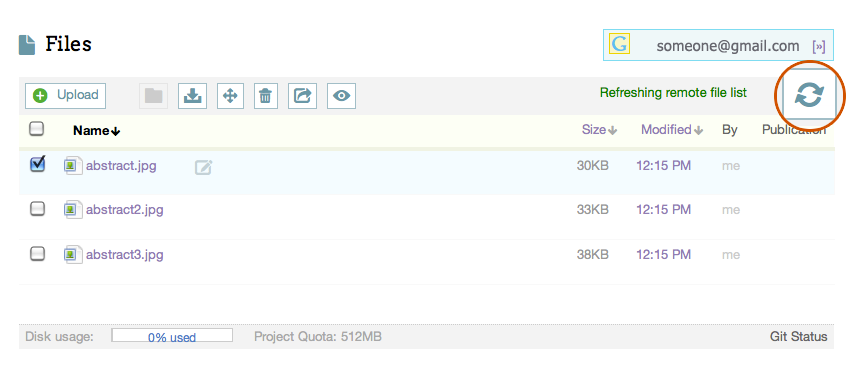
You cannot abort sync once it starts and you cannot initiate a new sync request until the current sync is complete. There may be a delay of one to several minutes imposed after each manual sync request. This is to prevent unnecessary repeated server requests and to make sure all changes get propagated and synced properly.
Versioning and conflicts
During sync only the latest change on a file gets checked in. Intermediate changes that happened since last sync get omitted. However, because local changes get synced immediately after they occur, it is usually only remote intermediate revisions that may be omitted in joint file history. Frequent syncing helps keep as much revision history as possible.
In the case of a simultaneous change on the same file locally and remotely, the remote (Google) version prevails and gets committed over local version. We're working on adding proper conflict resolution mechanisms.
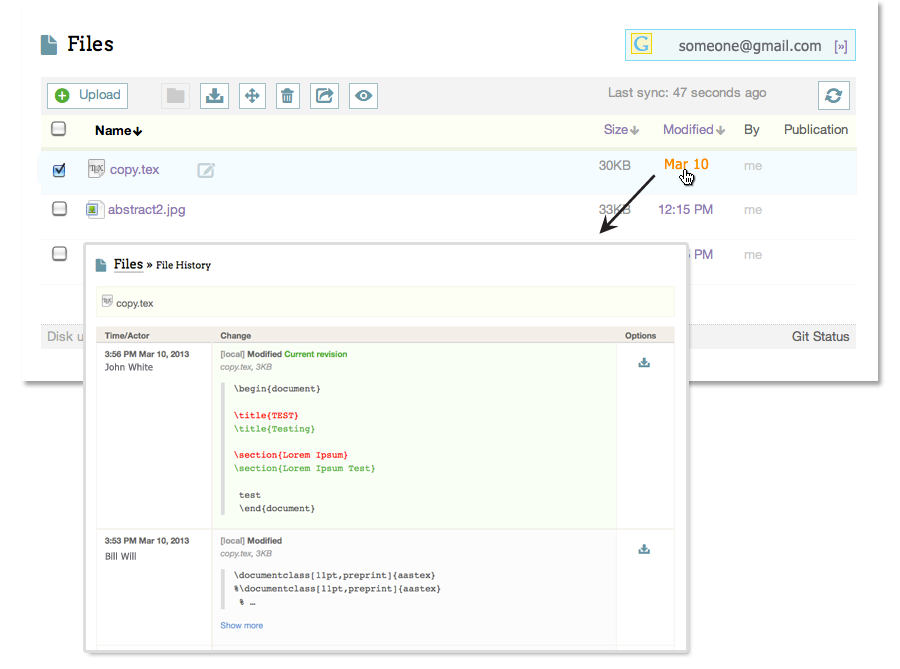
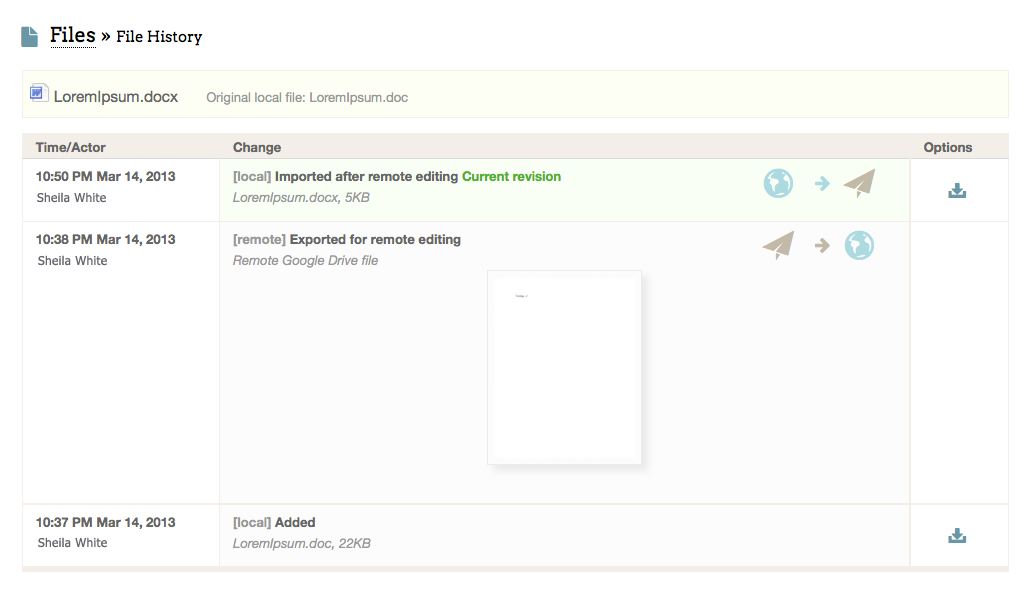
Meanwhile, detailed file revision history can be viewed locally by clicking on the modified time link for each file. There you can view diffs for text files and download older versions. The history will also show if the file was exported to Google for remote editing or brought back into the local repository.
Collaborative Editing via Google
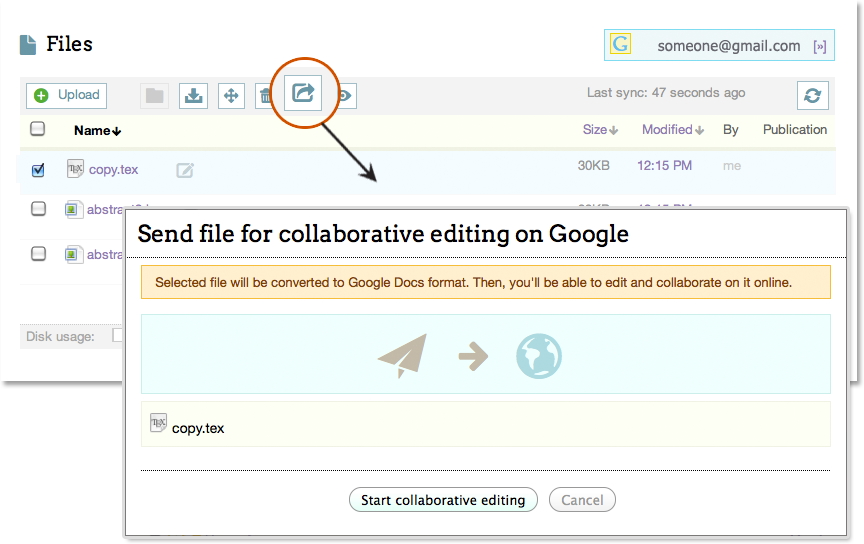
Connecting your project with Google Drive enables you to export local project files of certain types for collaborative editing in Google. When you send a file to Google for editing, it will be converted to appropriate Google Docs format (Docs, Sheets, Slides).
These are the file types that can be converted to a Google document, spreadsheet, or presentation:
- For documents: .doc, .docx, .html, plain text (.txt), .rtf, .tex*
- For spreadsheets: .xls, .xlsx, .ods, .csv, .tsv, .txt, .tab
- For presentations: .ppt, .pps, .pptx
- For drawings: .wmf
- For OCR**: .jpg, .gif, .png, .pdf
* We've added support for LaTeX files conversion to and from Google Docs. TEX files will be exported to Google as text files, and imported back into the local repository as .TEX. You can compile your TEX file (both local and exported to Google) into a PDF right in the Project Files browser.
** Optical Character Recognition (OCR) lets you convert images with text into text documents using automated computer algorithms. Images can be processed individually (.jpg, .png, and .gif files) or in multi-page PDF documents (.pdf). More on Optical Character Recognition.
Export local file to Google Docs
Select a file you wish to edit in you Project Files browser. If the Start Collaborative Editing button is active, it means that the file can be edited remotely.
After export, your file will appear in your Project as a Google Doc:
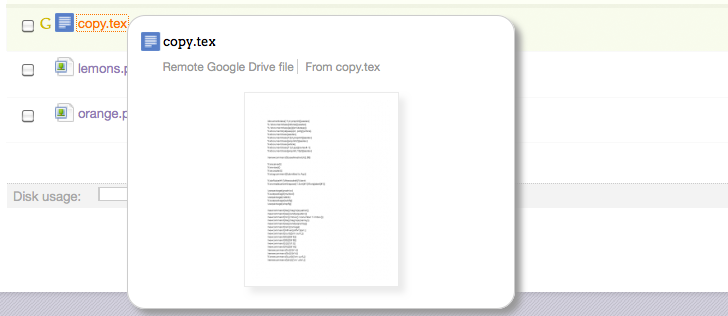
In your Google Drive the file may appear with a .gdoc (or other) Google Doc extension.
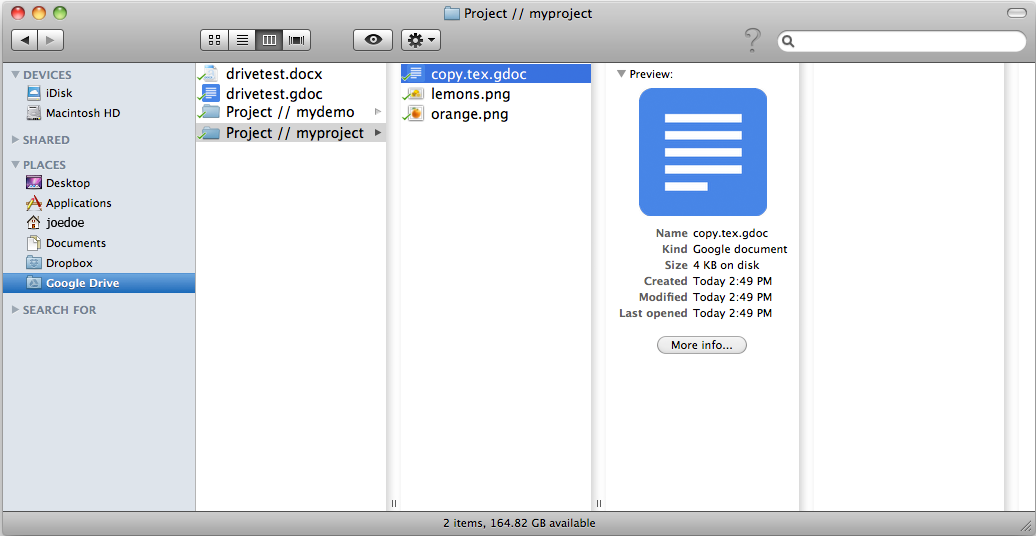
Now you and your project collaborators may work on the file together in Google Drive. With Google's Real-time collaboration multiple people can edit Google Docs at the same time from different computers.
Back in your Project Files browser you can preview the remote file as a PDF or JPEG. For .tex files exported to Google, the preview will be a compiled PDF that you can download and save back into project.
Import a Google Doc into the local repository
When you are happy with your edits of a Google Doc and wish to finalize the document for publishing in your Project or simply want to stop editing, you import the file back into the project repository. Select a remote file you wish to import and click on the Stop Collaborative Editing button. You'll get a choice of import formats:
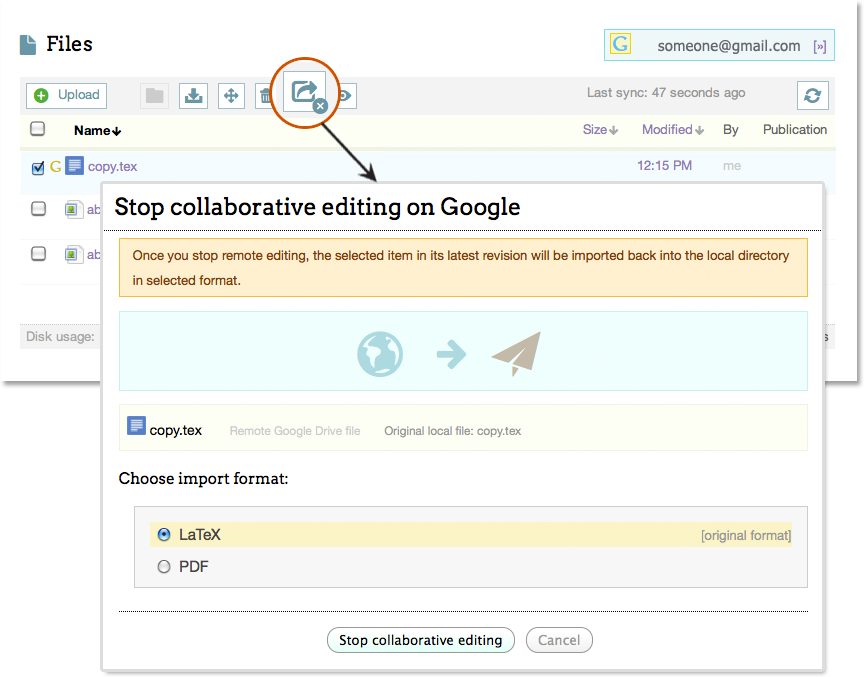
Please note that original files in old Microsoft Office formats (.doc, .xls, .ppt) will be converted to the new formats (.docx, .xlsx, .ppt) when imported. If the name and format of the original file are preserved, the original file will be restored/overwritten in the local repository. If the name or format change, the file will be imported as a new file, with the revision history showing the connection.
File Quota Usage
Every Project that is created is given a specific amount of GB for files and databases. To check on the usage of quotas follow these steps:
- Navigate to your Project and click on Files
- At the bottom of the Files page, click on the bar labeled Disk Usage
- You will be taken to a page that breaks down the amount of space you have left and the space that has been used by uploaded files
Now, if you are apart of a larger project and would like to request a quota increase for your project, then follow these steps:
- Navigate to the frontend of the Hub and in the URL address bar of your browser type in (http://yourhub.org/support/tickets)
- Inside the Support system, click on New Ticket located in the upper right of the screen
- In the ticket fill out this information:
- Name:
- Project Name:
- Grant Title:
- Grant PI:
- Grant Agency:
- Grant Budget:
- Short Explanation about your Project:
- Once you have filled out this information, click Submit, then a Support Team member will be in touch