Customization
Customizing a Group's Look
- On your main page of the group, click on Show Manager Controls and click on Customize Group.
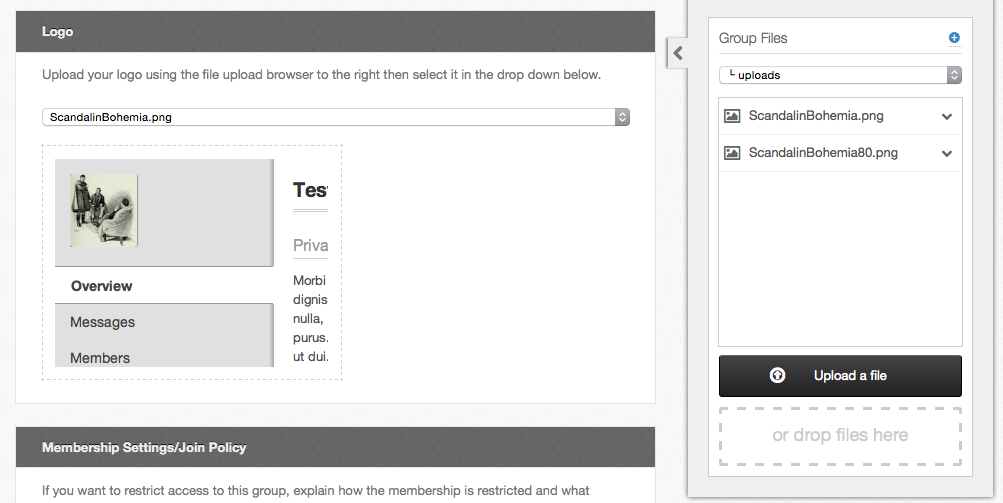
- Use the box on the right side of the page to upload a photo. Choose that photo from the drop-down box in the Group Logo section.
- Choose the custom content option in the Group Main Content section to add your own description.
- Specify access to individual tabs within the group in the Group Access section by selecting the desired option to the right of item in the list.
- Click Save Group Customization to save your changes.
- To customize all the group pages at once, click on Manage Group Pages in the Group Custom Content section. This will take you different interface away from the group customization area, please save all other changes before making this customization.
Customizing a Group's Calendar
Group Calendars: Subscribing to a Google Calendar
To subscribe to a Google Calendar, copy the Private Address for iCal, which is found in the Google calendar settings.
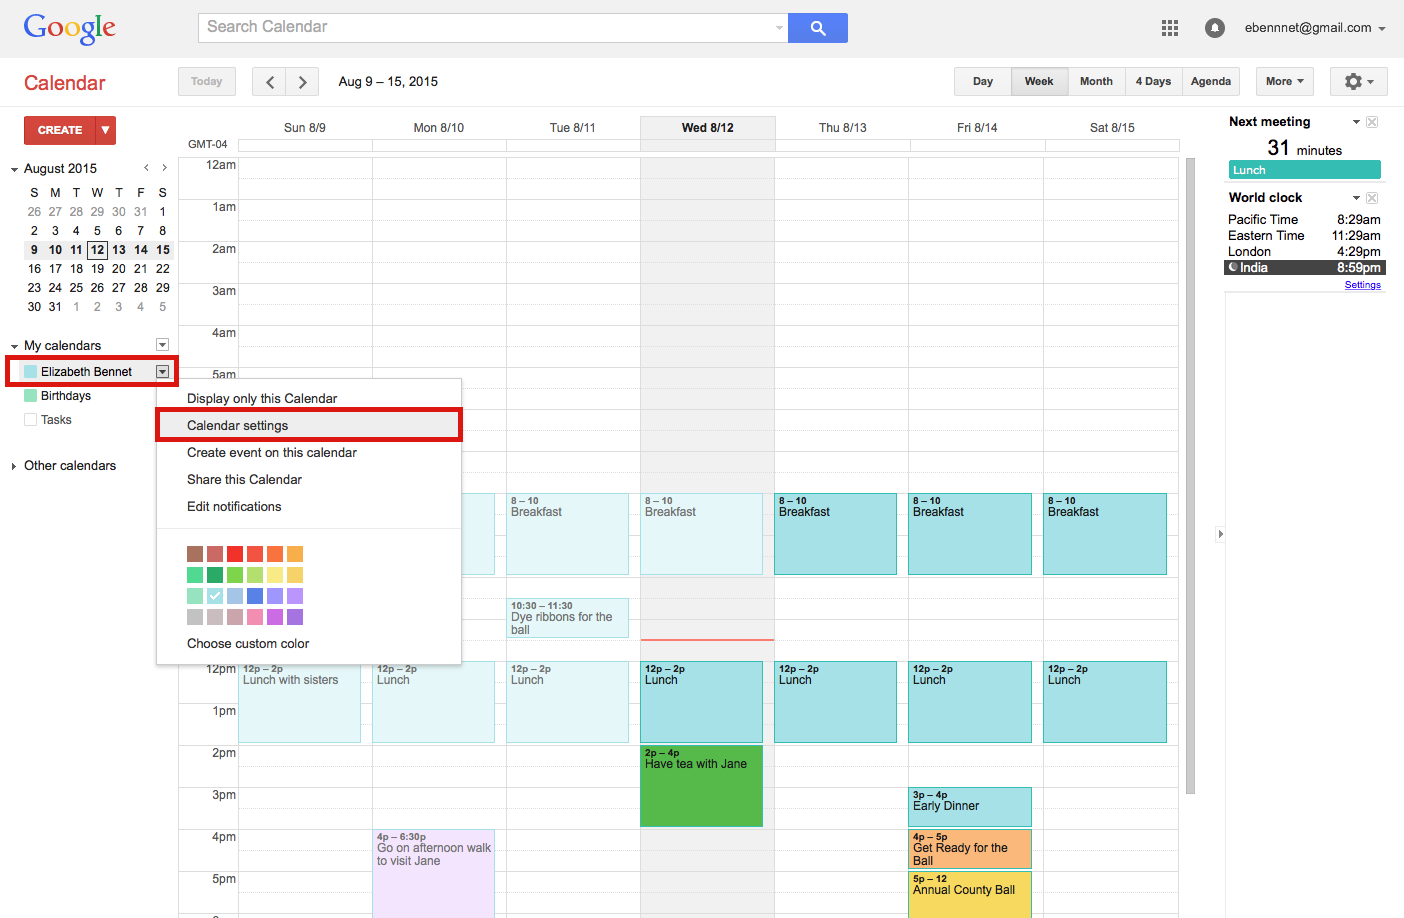
- Navigate to Google Calendar and under "My Calendars" select the calendar you wish to subscribe to.
- Click the drop-down arrow next to the appropriate calendar, and click Calendar settings.
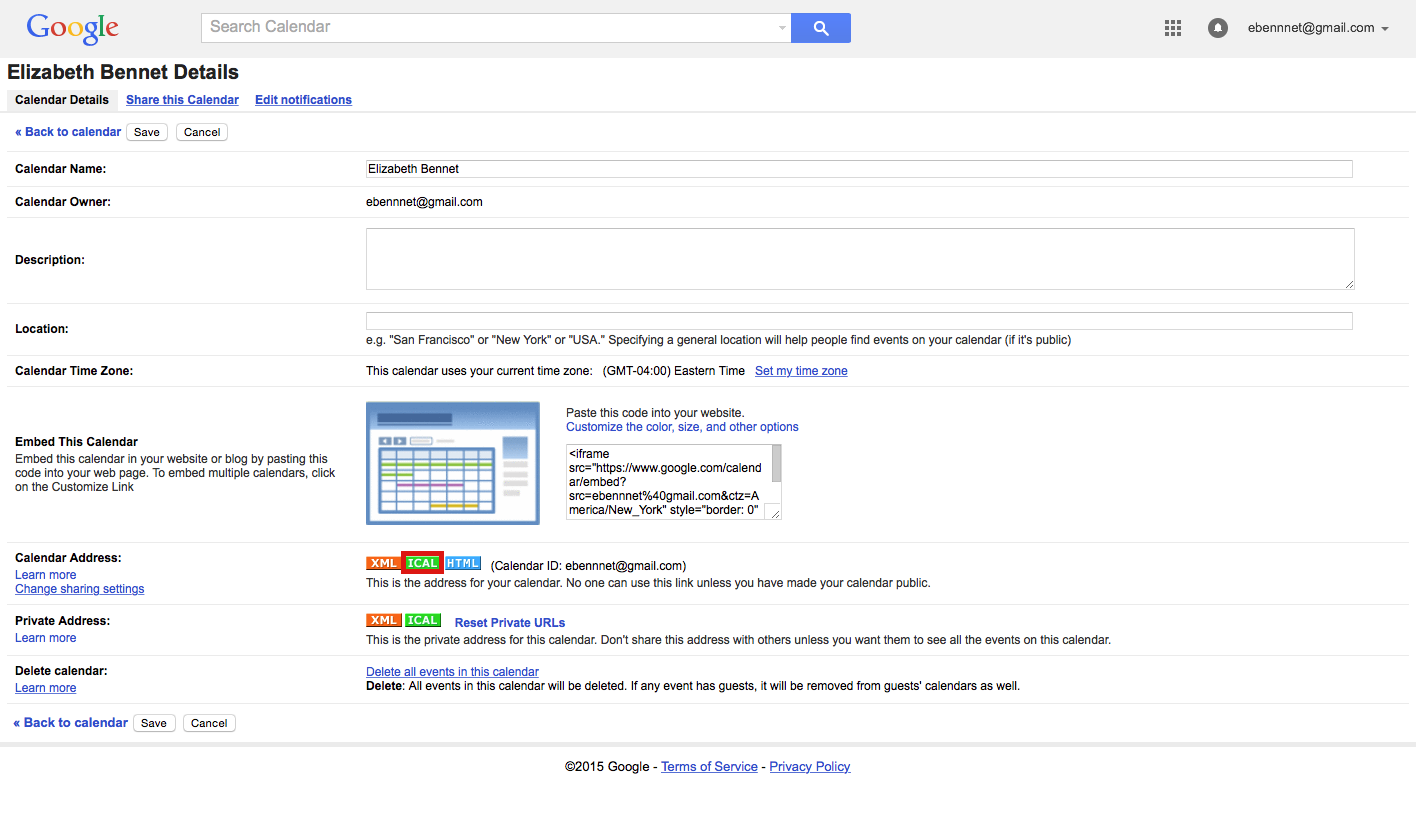
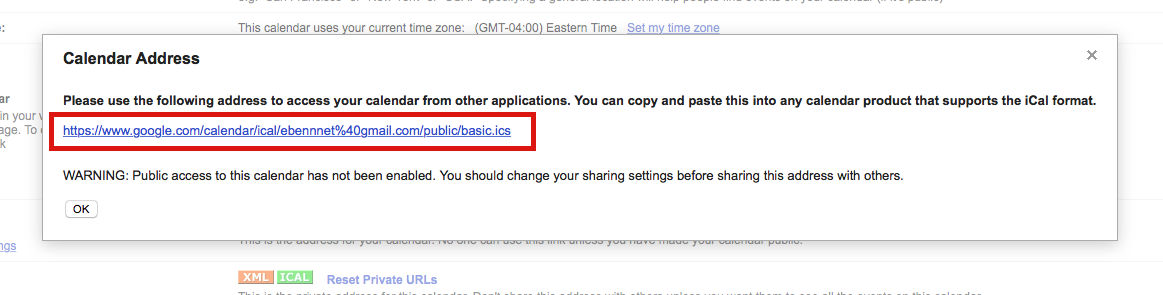
- Near the bottom, find the Private Address, and click ICAL.
- A pop-up should appear with an address that allows other applications to fetch the calendar. Copy the private address.
- Navigate to the hub, and sign in.
- From your Dashboard, click the Groups tab and navigate to your group.
- Once inside the group, click the Calendar tab.
- Next, click Manage Calendars. Then, click Add Calendar.
- Fill in the Title.
- Paste the private address that was copied from Google into the URL field.
- Choose a color for your calendar (optional). All events for that particular calendar will appear in the color chosen, or will remain black by default.
- Choose Yes or No to publish to subscribers.
- If yes is chosen, people who subscribe to the group calendar will be able to see the events from this calendar in their subscription.
- Click Submit.
- To fetch calendar events, click the Refresh Option.
- When you navigate back to the group calendar, you should now see that calendar appear.
Customizing Group Pages
Managing Group Pages:
- Log in to the frontend of the Hub and access a Group that allows users access to managing pages in the Group.
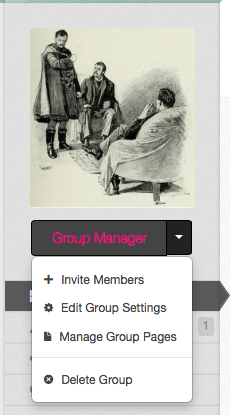
- Hover over the down-arrow, next to the Group Manager button.
- Select from the drop-down the Manage Group Pages button.
- From there you can manage all of the pages inside of the Group.
Creating a Group Page:
-
Log in to the frontend of the Hub and access a Group that allows users access to managing pages in the Group.
-
Hover over the down-arrow next to the Group Manager button.
- Select from the drop-down the Manage Group Pages button.
- On the Manage Pages tab, click on the New Page button.
- Fill in the title into the title field and alias into the alias field for the new page.
- Note: Page alias' can only contain alphanumeric characters and underscores. Spaces will be removed.
- Then, fill in the content of the new page in the content text box.
- Select the publishing settings status from the drop-down.
- Published- the page is available on the Hub’s frontend
- Unpublished- the page is unavailable to the Hub’s frontend but can be accessed still by the creator and on the backend of the Hub
- Select the privacy settings from the drop-down.
- Inherits overview tab’s privacy setting- The previous setting of the overview tab also is enabled for this page
- Private Page- Accessible to only members of the Hub
- Underneath the Settings, select a category from the Category drop-down.
- Click Save Page to save the new page and the newly added content.
Embedding PHP or Javascript Code in a Group Page (advanced feature):
It is possible to insert PHP or Javascript Code into a Group page to allow more flexibility when constructing a page. This is a feature meant for developers to provide advanced capabilities the page. Due to security considerations, a page approver must be assigned on the administrator Group interface under "Options". This is a textbox that is expecting a comma separated list of usernames who will be messaged when a page containing PHP or Javascript code is submitted. Until the page is approved, the previous version will be displayed or a message indicating the page needs to be approved, if there exists no previous version.
Editing a Group Page:
- Log in to the frontend of the Hub and access a Group that allows users access to managing pages in the Group.
- Hover over the group management button.
- Select from the drop-down the Manage Group Pages button.
- Inside of Manage Group Pages, select the Manage Pages tab and then locate the page that needs editing.
- Click on the arrow next to the page’s Manage Page button.
- From the drop-down select Edit Page to begin editing the page’s content.
- Edit the content inside of the group page and then click Save Page to save the newly edited content.
Deleting a Group Page:
- Log in to the frontend of the Hub and access a Group that allows users access to managing pages in the Group.
- Hover over the down-arrow next to the Group Manager button.
- Select from the drop-down the Manage Group Pages button.
- Inside of Manage Group Pages, select the Manage Pages tab and then locate the page that needs deleting.
- Click on the arrow next to the page’s Manage Page button.
- From the drop-down select Delete Page and the page will automatically be removed from the group and the Hub.
Creating a New Page Category:
- Log in to the frontend of the Hub and access a Group that allows users access to managing pages in the Group.
- Hover over the down-arrow next to the Group Manager button.
- Select from the drop-down the Manage Group Pages button.
- Navigate to the Manage Page Categories tab.
- Click on the New Page Category button and then fill in the title and select the color for the new category.
- Click Save Category to create a new category.
Editing a Page Category:
- Log in to the frontend of the Hub and access a Group that allows users access to managing pages in the Group.
- Hover over the down-arrow, next to the Group Manager button.
- Select from the drop-down the Manage Group Pages button.
- Navigate to the Manage Page Categories tab.
- Locate the category that needs editing and by the Manage Page Category button click the arrow.
- From the drop-down select Edit Page Category and then edit the content inside of the page category.
- Click Save Category once finished to save the newly edited content.
Deleting a Page Category:
- Log in to the frontend of the Hub and access a Group that allows users access to managing pages in the Group.
- Hover over the down-arrow, next to the Group Manager button.
- Select from the drop-down the Manage Group Pages button.
- Navigate to the Manage Page Categories tab.
- Locate the category that needs to be deleted and by the Manage Page Category button click the arrow.
- From the drop-down select Delete Page Category and the page category will be automatically removed from the group and from the Hub.
Group Forum: Digest Emails
Group members have the ability to receive emails from the group forum. The group member can be emailed every time another member creates a new post in a forum. Each group member can manage their own settings so they receive new posts in the group.
- Navigate to the main Group page then click on the Forum tab.
- Inside of the Group Forum, locate Email Settings and click on Change your settings.
- In the pop-up determine the preferred email setting by clicking the check box next to Email me about new posts in this group.
- Then, select the radio button next to the preferred emailing time frame of receiving group forum emails Individually as new posts are made or As part of a (Daily, Weekly, Monthly) digest email.
- Click Save to save the email setting changes.