Projects
Component Configuration
The Projects component has a number of configuration parameters that let you customize projects on your hub. Go to /administrator → Components → Projects → Options to edit settings. Your options are explained below.
- Component ON/OFF Main switch of projects on your hub. When turned off, /projects will redirect to hub's home page.
- Collect grant info at setup? Include/hide a section with questions about grant information, e.g. [NSF] grant id, title, PI and award amount, at project setup. Some hubs collect this information to provide larger disk space quotas for sponsored projects.
- Setup - 'Agree to Terms' screen Enable/disable 'Agree to Terms' step at project setup. Warning: this setting should be set only once at initial hub setup. Once enabled, do NOT disable. Disabling the agreement step will render all projects currently in setup as inactive. On the other hand, enabling the agreement after it was disabled will force project creators to return to setup stage and accept the Terms. It is generally recommended to have the agreement step enabled.
- Allow project settings editing? Enable/disable a screen to edit project settings after project setup.
- Ask about sensitive data? Include/hide a question about sensitive data (HIPAA/FERPA/Export Control) at project setup. There is an optional approval process for projects containing sensitive data.
- Must approve sensitive data projects? Require approval for sensitive data projects. If approval is required, a project with sensitive data will not be immediately available to project team. An approval has to come from user(s) in admin group specified in "Sensitive data reviewers group" parameter. Learn more about managing sensitive data projects.
- URL to Privacy Terms Shown at project setup, when user needs to agree to Privacy Terms.
- URL to HIPAA information The Health Insurance Portability and Accountability Act of 1996 (HIPAA) rules create a framework to protect the privacy and security of patient’s and health plan member’s health information. When including a question about sensitive data, provide a URL to explain HIPAA rules.
- URL to FERPA information FERPA is the Family Educational Rights and Privacy Act and is a federal law that was enacted in 1974. FERPA protects the privacy of student education records. All educational institutions that receive federal funding must comply with FERPA. When including a question about sensitive data, provide a URL to explain FERPA rules.
- Restrict project creation to group Alias of a group whose members can create projects. When set, all other users will not be able to create new projects on the hub.
- Admin group Alias of an administrative group that gets notified when a new project is created or over quota
- Sensitive data reviewers group Alias of an administrative group that can access a special project listing to review info on HIPAA/FERPA/export control.
- Sponsored projects reviewers group Alias of an administrative group that can access a special project listing to review and edit sponsored project information and bump up quota.
- Minimum characters in name Min number of characters a project alias name can contain.
- Maximum characters in name Max number of characters a project alias name can contain.
- Reserved project names Comma-separated list of words and character combinations that cannot be used as project alias names. These are usually reserved for component task names used in features in development.
- Files Git repo path Master path for storing project files Git repos. Default path: /srv/projects. The system administrator needs to ensure the path exists and is writable by www-data before any project is created.
- Files repo path is... relative to web root/ absolute. Default value: absolute.
- Git path Path to Git. Default: /usr/bin/git
- Default quota (GB) Default disk quota for project files repos, in gigabytes. Note: admins can overwrite the default value and set specific project quota when editing a project in the back-end. When default value is overwritten for a specific project, any changes to default value have no effect in this particular project and must be adjusted manually when required.
- Premium quota (GB) Premium disk quota for project files repos, in gigabytes. Premium quotas are usually assigned for approved grant-sponsored projects.
- Quota warning at (%) Issue disk quota warning when disk space is used at a certain percentage amount of the given quota. Default value: 90.
- Publication quota (GB) Default disk quota for published files, in gigabytes.
- Premium publication quota (GB) Premium disk quota for published files, in gigabytes.
- Image path File path to project images (thumbnails). Default: /site/projects
- Default picture Path to default placeholder picture for project thumbnail. Default path: /components/com_projects/assets/img/project.png
- Log activity Enable/disable detailed activity logging. The stored logs track page views and activity by type within projects and can help analyze usage patterns.
- Messaging Enable/disable hub messaging. Messages are sent to invited project members, to project managers about project status changes or to publication authors about publication status changes. Turning off messaging may be useful in test hub environments. On live hubs it is highly recommended to keep messaging enabled.
- Default privacy Default privacy for newly created projects: private or public.
- Browse paging limit Number of projects per page on Projects Browse page.
- Side module item limit Limit of items (files, notes etc.) in side modules of each project page.
- Project group prefix Prefix for project group name (system group provisioned for each project to handle permissions). Default: pr-. Warning! Never change the value once configured at initial hub setup.
- URL to documentation URL to a page with the projects user guide. By default links to /projects/features page briefly describing project features.
- Auto-install Check database setup on every visit and automatically add missing database entries. When turned off, system administrators will need to manually install database updates when new features are added.
Project Files Configuration
Project Files configuration is found under /administrator → Extensions → Plug-in Manager → plg_projects_files. Below is a list of Project Files plugin parameters explained:
- Max Upload Size (Bytes) Maximum upload size for project files. The value should not be greater than the file upload limit in your hub's php configuration.
- Max Download Size (Bytes) Maximum download size for project files. This setting is only used in case of batch downloads, to guard against archival packages getting too large for the server to handle. Individual file downloads are not checked against this parameter.
- Reserved Directory Names Comma-separated list of names that are not allowed for top-level directories within project files repos. Used to reserve directory names for features in development.
- Google Connection Enabled Enable GDrive connection. Will not work without Google Client ID, Secret and API key entered.
- Connected Projects Comma-separated list of aliases of projects that can connect to GDrive. Empty field means ALL projects can connect.
- Google Client ID Client ID for web applications from Google API Console. See instructions for setting up GDrive Connection for projects.
- Google Client Secret Client Secret for web applications from Google API Console. See instructions for setting up GDrive Connection for projects.
- Google API Key API key from Google API Console. See instructions for setting up GDrive Connection for projects.
- Auto Sync Frequency of automatic sync with Google, when GDrive connection is enabled for projects.
- Enable LaTeX Compile Enable compile feature for .TEX files
- Path to LaTeX Path to pdflatex. Default: /usr/bin/
- Path to Ghostscript Path to Ghostscript (used to produce images out of PDF for browsers that cannot embed PDFs. Default: /usr/bin/
Enabling GDrive Connection for Project Files
To enable GDrive connection for hub projects you would need a Google account for your hub with API access enabled. Because your Google email address and profile picture will be displayed to users as they connect via projects, it is best to create a new Google account representing your hub, rather than using your personal account.
To sign up for a Google account, follow a Sign Up link on Google Accounts
Once you have a Google account, login to Google API Console and click the button to Create a Project: 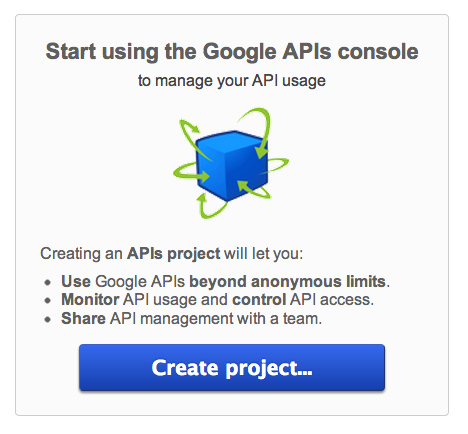
Next you will be asked to selected services for your new API project. Turn on Drive API and Drive SDK services, accepting service terms. 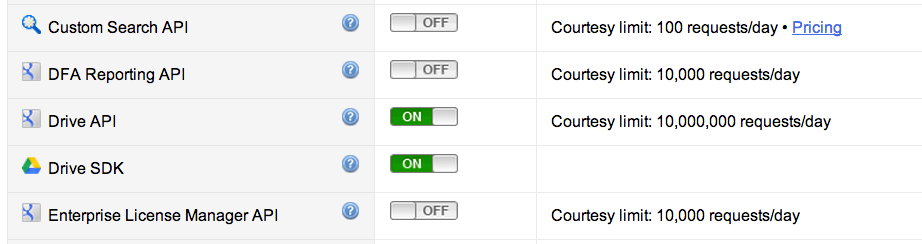
Go to API Access tab in your API project and click the button to Create an OAuth 2.0 client ID: 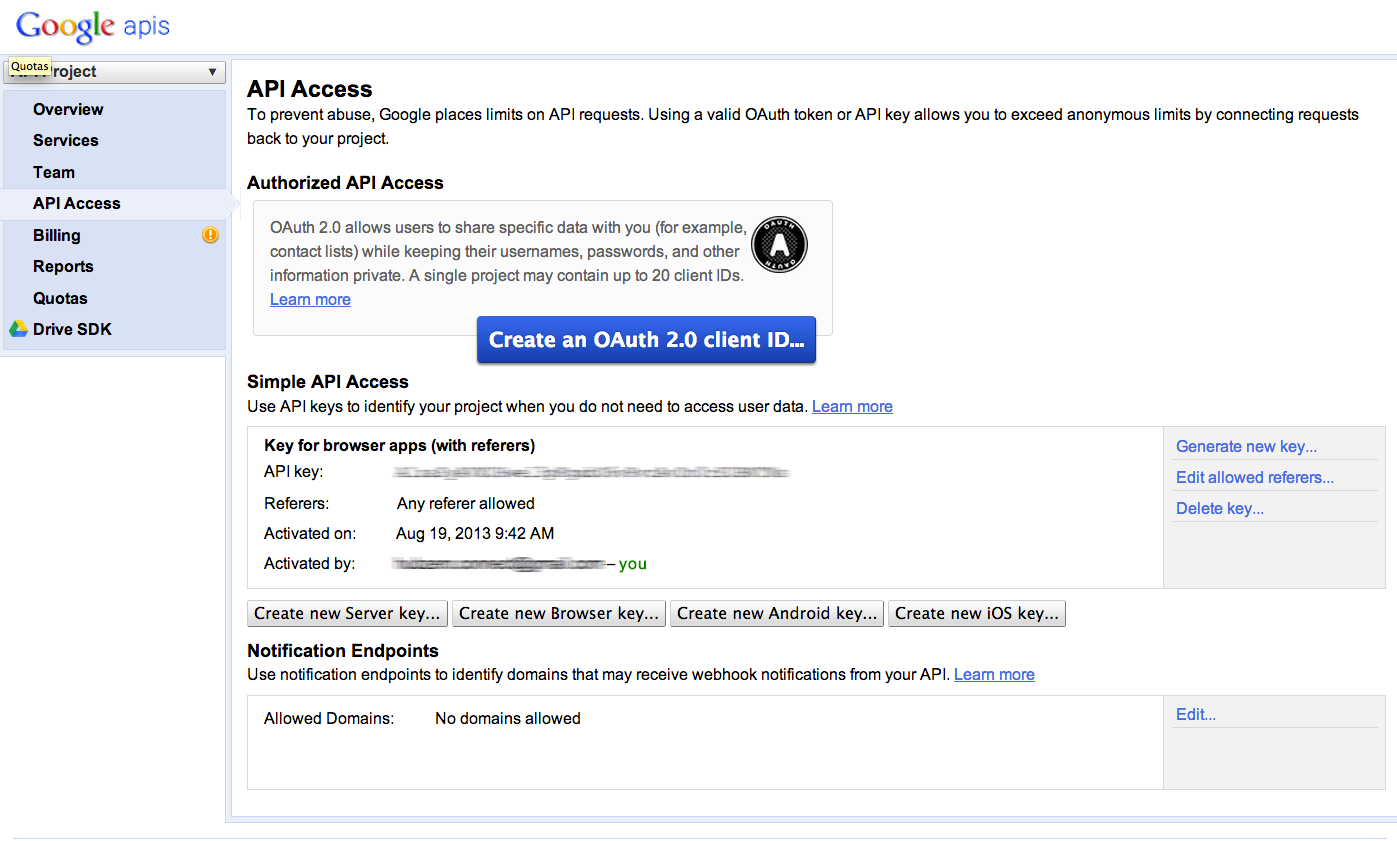
On Branding Information screen enter Project Files to Google Drive Connector under Product name. For the Product logo we recommend that you use HUBzero image at http://hubzero.org/app/site/media/images/sync.png. Enter your hub URL for Home Page URL and go to next screen. 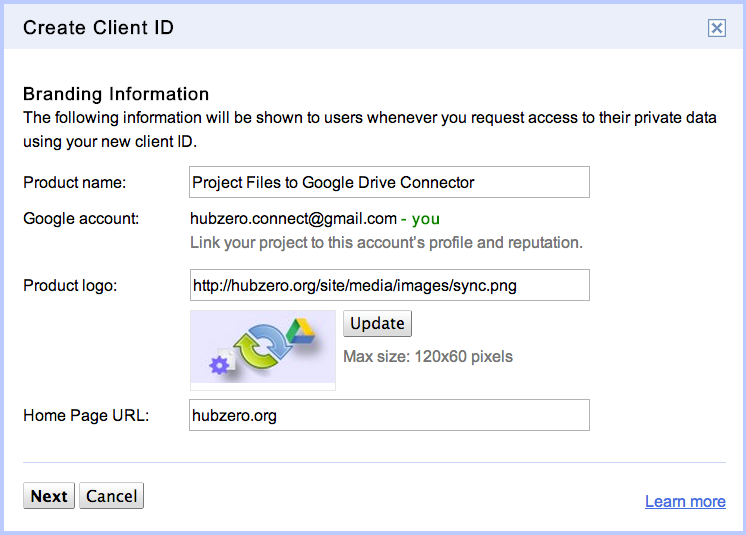
On Client ID Settings screen choose Web application as Application type, enter your hub host name and click on Create client ID 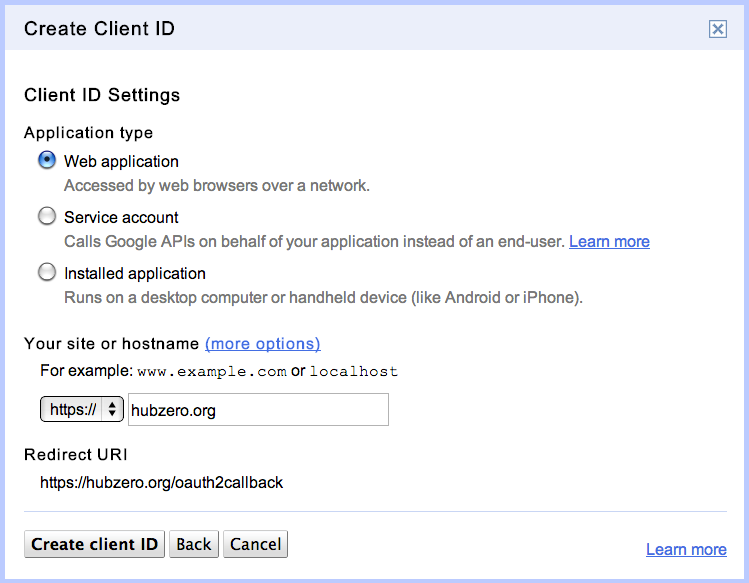
Once your Client ID for web applications is created, click to Edit settings and change Authorized Redirect URI to 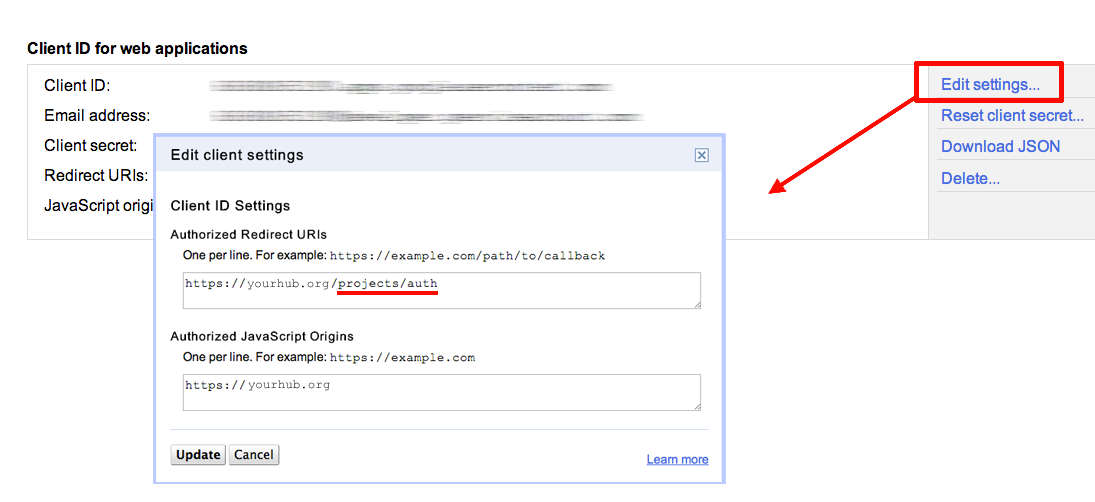
Now you have all you need to enable GDrive Connection for projects in your hub. Login to your hub's administrator back-end, go to Plug-In Manager and open Project Files plugin settings. Choose Yes for Google Connection Enabled parameter and fill in Google Client ID, Client Secret and API Key under plugin Basic Options.
If you want to offer GDrive connection for selected projects only, enter the aliases of those projects under Connected projects. Another optional setting is Auto Sync, which allows you to set desired auto sync frequency. 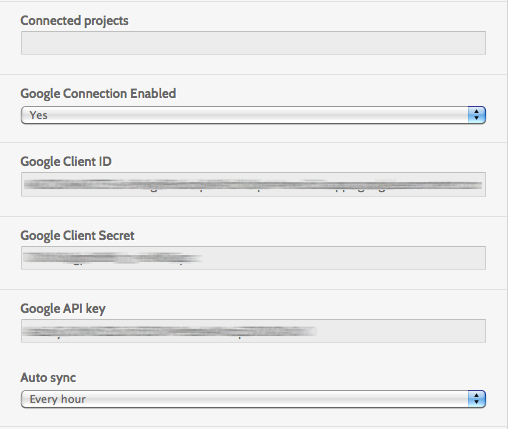
Now selected or all projects should have GDrive connection enabled. Individual creators of those projects will now be able to see the Connect button in Project Files and establish the connection. GDrive Connection User Guide available at /documentation/1.2.0/users/projects/projectfiles.
Managing Sensitive Data Projects
Sensitive data can include personal, financial, and legal information, as well as information protected by state or federal laws and by university policy. Federally-protected restricted data include all individually identifiable health information (HIPAA-protected information), student records and grades (FERPA-protected information).
As a hub manager, you need to have a plan for managing projects containing sensitive data. "Ask about sensitive data?" parameter in Projects component configuration offers three options:
- No - do not ask about sensitive data. The question about data will then be omitted during project setup. Project creator will not be warned about storing sensitive data and can proceed with project setup. Use this option on hubs where data sensitivity is not an issue or your hub is otherwise protected. You may want to include a clause about sensitive data in your site usage terms.
- YES, with one general question - project creator will need to agree not to store any sensitive data in the project. The question asked will look like shown below:

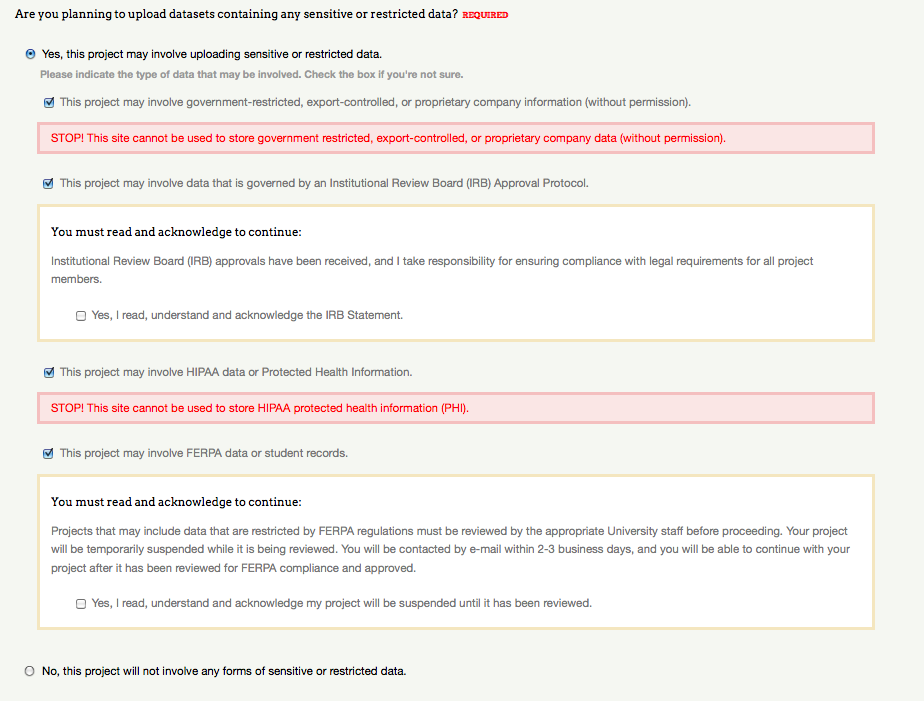
- YES, with HIPAA/FERPA etc. options - details on sensitive data will be presented. Only certain types of sensitive data are allowed, upon expert approval. The picture below shows all presented options expanded. IRB and FERPA may be allowed.
"Must approve sensitive data projects?" parameter in Projects component configuration controls what happens when user checks sensitive data box(es) on screen above and proceeds with project setup. If administrator approval is required, the project will fall into suspended status immediately project setup is complete:

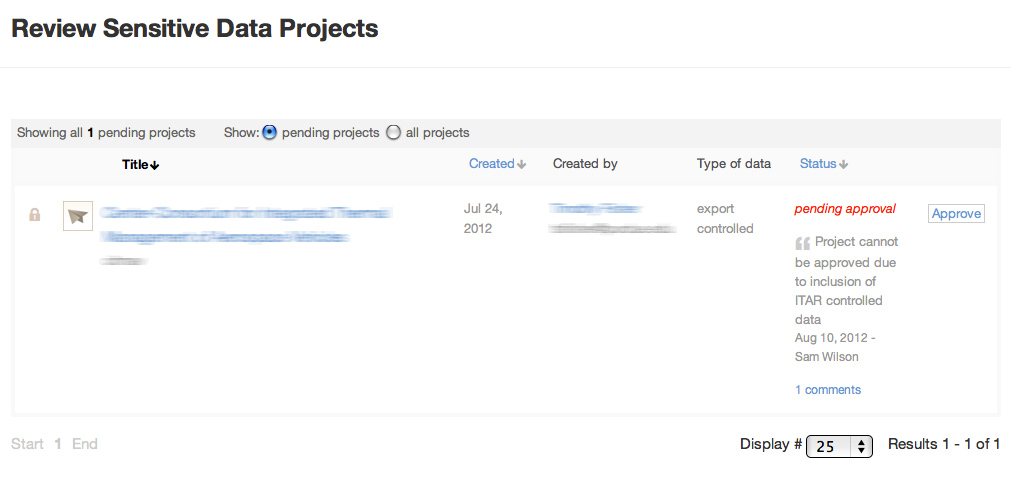
Administrator(s) in "Sensitive data reviewers" group (assigned in component parameters) will get notified by email of a new project requiring approval. The link to the page to manage and approve sensitive data projects will be included in the email. This protected page can be found at /projects/browse/?reviewer=sensitive. Reviewers see a list of projects requiring approval and take action by clicking on Approve button:
The approval screen provides an area to communicate with project creator with or without project approval.
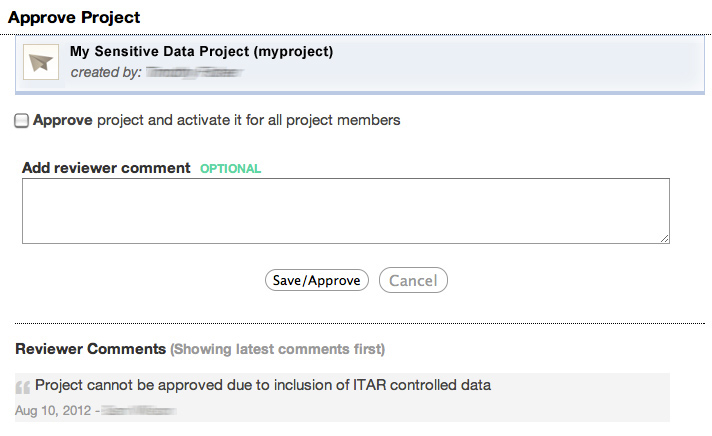
As soon as a project is approved, team members get notified and can start using their project.
Managing Sponsored Projects
Hubs that offer Projects as a data management solution for faculty may want to collect awarded grant information to allocate the appropriate amount of data storage space to sponsored projects. To turn on grant information questions, go to Projects component configuration and enable "Collect grant info at setup?" setting.
In the final step of project setup project creator will be able to fill out this information: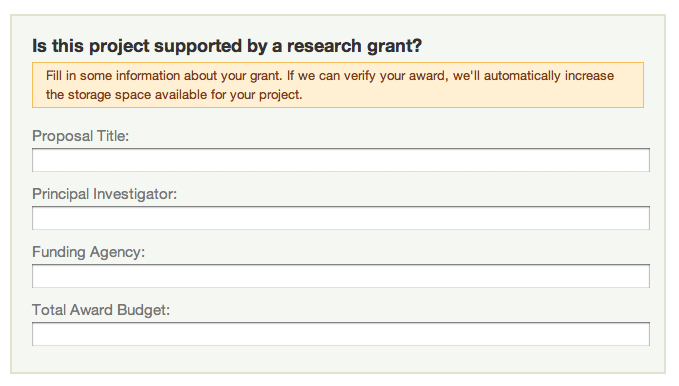
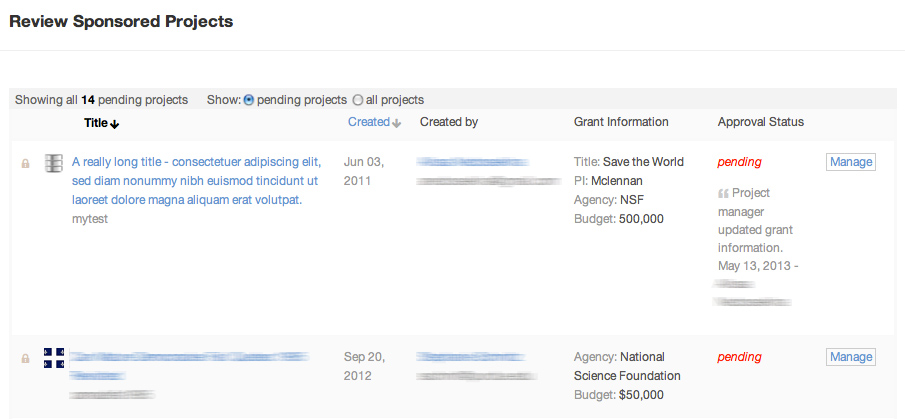
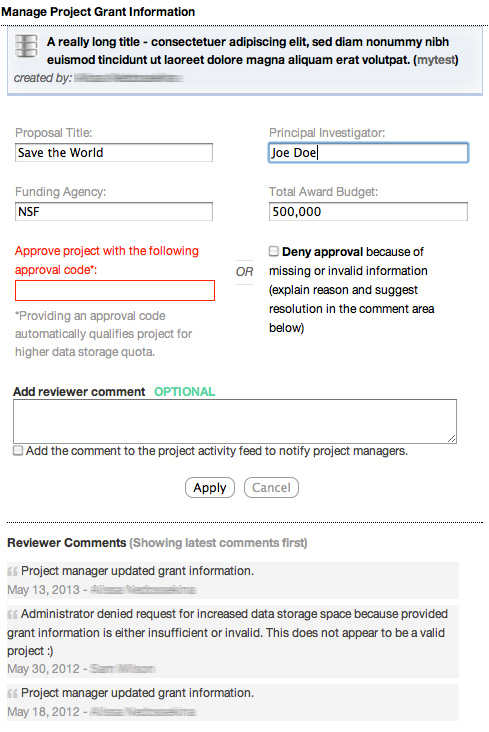
When grant information is filled out, dedicated reviewers (members of admin "Sponsored projects reviewers" group assigned in component configuration) will get notified by email with a link to manage and approve projects for larger disk space. The protected page can be found at /projects/browse/?reviewer=sponsored. Reviewers see a list of projects requiring approval and take action by clicking on Manage button:
The approval screen provides an area to communicate with project creator, approve or reject disk space increase.
Approved projects automatically get their project disk space quota upgraded to the Premium Quota specified in component configuration
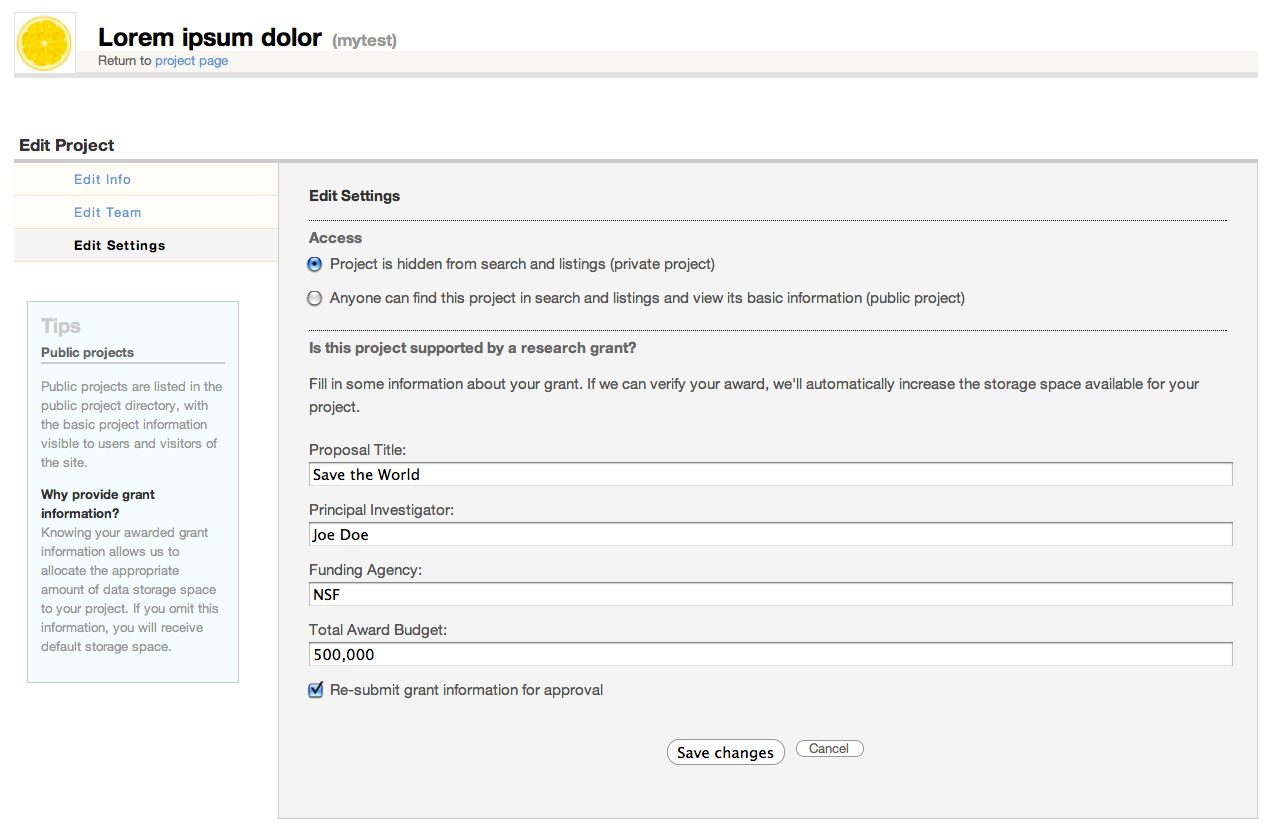
Project managers can add/edit grant information at any time after a project has been created and optionally re-submit this information for administrator approval. The grant information would show up under Edit Settings:
Enabling Publishing
Projects integrate a publishing engine to get project materials delivered to the world in the form of web publications. Each publication receives a Digital Object Identifier so that others can cite it. Public can write reviews and add ideas to the Wish List for each publication.
Publication versus Resources
Hub Publications look and function much like hub Resources. In fact, Publications are meant to replace Resources in the foreseeable future, once all resource types are supported in the new publishing process. As of today, users can publish documents and databases (if DataStore Lite is enabled). Next in line for publication are project notes, tools and external links. If your new hub is not planning on publishing tools other than Workspace Tool, you can enable Publications on your hub and turn off Resources. On the other hand, if you are using Resources extensively or plan to immediately publish tools, it is best NOT to enable Publications for the time being to avoid any possible confusion.
Steps to enable Publishing
- Ensure that Auto-install option is set to ON in component configuration.
- Go to /administrator → Extensions → Plug-in Manager and enable Project Publications plugin (pls_projects_publications)
- Go to yourhub/projects and refresh the page once. At this point the auto-install script should have done the work of checking hub database structure and adding anything missing.
- Next go to /administrator → Components → Publications → Options and make sure Component ON/OFF parameter is set to ON. Note: if you do not see Publications in the component menu, you can access it by going to /administrator/index.php?option=com_publications.
- Configure publishing as needed, following the detailed explanation of Publications Component Configuration.