Frequently Asked Questions
Article Pages: Can articles be assigned to multiple categories or sections?
No, articles and other content items cannot be assigned to multiple categories or sections. Possible work-arounds include:
- Creating duplicate articles in multiple categories.
- Using menus rather than dynamic lists of content items.
- Using various third party extensions that simulate assignment to multiple categories.
- Using key words to simulate categories and sections.
Collections: What is the difference between a post and a collection?
Post: A post is a singular piece of content that can be posted in a collection. A post can house a link or file with a description added to it. Posts can be collected or followed by other users on the Hub.
Collection: A collection houses all posts in one file. A collection must be produced before uploading content into the collection. The relationship of a collection and a post is similar to a filing system. The collection is the file and the posts are the documents or content that is placed in the file. Both posts and collections can be reposted or collected by users of the HUB. The privacy settings of a collection determine who can view the collection and it’s posts.
Collections: What happens when you collect a Post or a Collection?
When a user collects a collection or post on the Hub, the user is saving the information into his or her collections. When collecting a post, the content of the post is resubmitted as a new post in a collection owned by the user. When a collection is collected, the user is saving the collections' URL as a new post in a collection owned by the user. Then the user can simply revisit the collected collection by clicking on the new post in the his or her collection.
Collections: What are Followers in Collections?
Followers are the users from the Hub who follow other users through the component Collections. Everything that another user posts will show up in their feed. This way all the new content added to a Collection by the user can also be viewed by the follower. This is a great way of sharing ideas and resources between individuals on a Hub.
Projects: How do you connect Google Drive in a Project?
Note: The creator of the project must connect their Google Drive prior to others adding on their Google Drives to the project.
- Navigate to https://yourhub.org/projects.
- Access the project that you wish to add your Google Drive to.
- Inside of the project access the Files tab and locate the Connect button.
- Click the Connect button and then click the second Connect button, which will redirect your page to Google.
- If you have already logged on to Google with an account, Google will remember that account. If you wish to login with that account confirm the message that "Hubzero would like to: Have offline access". Click Accept to confirm.
- Note: If you do not wish to login with that account, you will have to log out of Google and sign in with a different account. Then repeat the steps above.
- Then you will be relocated back to the project confirming your Google Drive connection to the project.
- If you have other team members in your project, they will be able to connect their Google Drives to the project now.
Projects: How can I view file history in Projects?
Each project comes with a Git repository to store your files and data. With this comes a built-in web file browser, which reads the repository and allows to do multiple-file uploads, delete, rename and move files around, compile LaTeX files into PDF, as well as view file history, diff revisions and download all previous versions. In addition, we are now working on a solution for you to use the full power of Git for advanced file management through direct Git commands.
To view file history, click on the date in the Modified column in the Files area. This will show you the history of the file, and any previous versions if they have been uploaded.
Projects: What are “My To-Dos” in Projects?
Inside of Projects there is a special feature where tasks can be posted and assigned to members of the project. On the right side of the page under the lists of to-do’s are the My To-do’s. This is the list of all to-do lists assigned to you. The default to-do list is a list of all to-do’s inside of the project. You will see your personally owned to–do lists by clicking on My To-do’s. To add a new to-do list, simply click on Add. When you create a new to-do item, you can choose from the list any of the to-do lists you created. You will not be able to add to My To-do’s because this is a default list that is automatically populated with to-do items assigned to you.
Resources: What is a Parent Resource versus a Child Resource?
In any filing system, a naming device is used to explain the main files and their subfiles. The main file is the "Parent" to all of the subfiles within that folder. These subfiles are called "Children". At Hubzero, we use this standard naming device to describe the relationship between Resources and Sub-Resources. The main resource is the "Parent" and any sub-resource/s that are directly placed under the "Parent" are called child or children resources.
Tags: What are tags and how do they work?
Tags are like keywords or category labels. Tags help you find content, events, and members which have something in common or similar interests. Tags can be added to groups, your profile, resources, wiki pages, and events. When creating or editing content, your profile, groups, etc. you can add or remove tags as you wish. If a tag does not exist, simply typing it in a Tags form field will create it and make it available for everyone to use on the Hub. Once a tag has been created, Hub search engines will pull the contribution documents and resources linked to that tag whenever a user searches a word related to a tag.
Tags: Creating a Tag
- Navigate to https://yourhub.org/.
- Log in to the frontend of the Hub and access a section of the Hub where tags will be available.
- Begin to edit the new media type.
- In the Tag text box, type in the phrase or word that the tag will be.
- Once the project is saved, the new tag will be created.
Usage: What is user Usage?
These statistics list off the contributions that the user has made to the Hub, the tool usage, and the resource usage.
To find the user Usage:
- Navigate to https://yourhub.org/.
- Log in in to the frontend of the Hub and navigate to the user dashboard.
- In the left sided tab list there will be Usage, proceed to that page.
- There all of the personal usage that the user has consumed on the Hub has been recorded in tables.
Wishlist: How is the consensus of a wish calculated?
Under My Opinion, each user can choose the importance and effort that will go into creating the final product outlined in a wish. The consensus combines all votes received and averages them. The total number of votes can come from the total number of people in the group, the number of people in the group of wishlist owners, plus any users who have been given access to view the wishlist. Any of these individuals can cast a vote for your wish, but the consensus will only be calculated as a percentage of the few that voted Yes out of the whole who can vote.
Wishlist: How do you creating a wish?
- Navigate to https://yourhub.org/wishlist to access your Hub's Wishlist.
- On the Wish List dashboard, click on the Add a Wish button.
- Check the box to post anonymously or leave the box unchecked to put your name on the wish.
- In the first text field, describe in a short sentence the wish.
- In the second text field, give a more detailed explanation of the wish that you are asking for. Be specific in this section. The more detailed you are the easier it is for our developers to understand your request.
- Tag the wish to connect it to the area of the Hub where you are wishing a change would appear, such as "Projects" or "Events".
- Click Save to upload your wish to the wishlist.
- Your new wish will appear on the wishlist.
Terminology of Wishes
- Active- open wishes where people can vote on the wish
- Accepted- the wish has been accepted and will be activated
- Rejected- the wish will be denied for now
- Granted- the wish is already available or will be in the next code update
- Like- voting up the wish
- Dislike- voting down the wish
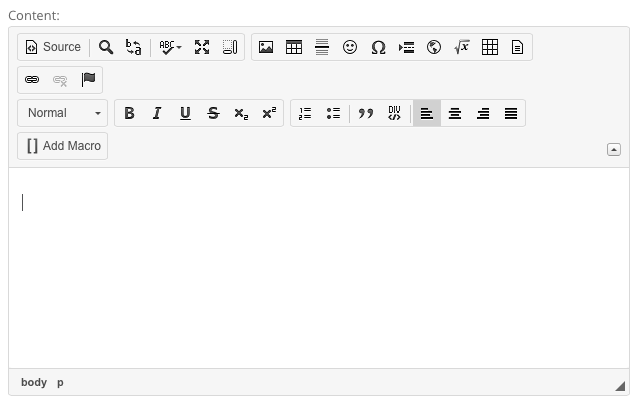
What is CKEditor?
CKEditor is a WYSIWYG text editor designed to bring common word processor features to allow easy entry of content into web pages. Some features found in common word processors may not be found in the editor to preserve the design of the site. The editor can be found almost everywhere on the hub where content entry is available. This includes administrator interface content entry areas, as well as, the front user interface.