Storefront
Overview
There are six main sections that must be completed in order to add a product to the storefront: products, product options, product skus, collections, option groups, and options.
All actions listed here take place in the administrator interface of the hub, similar to https://hubname.org/administrator. Proper administrator privileges and logging in are required.
Storefront component can be found by:
- Log into the administrator interface (/administrator)
- From the Main Menu point the mouse to Components -> Storefront (click)
Some terms that will be helpful:
Control buttons: Always at the top right of a page, but under the logout button. Typical actions include: Save, Save and Close, Cancel, New, Edit, etc.
Alias: Refers to the short name of a name or title that appears in the URL. Does not usually include numbers or symbols. For example, a collection entitled “Antivirus & Security Software” has an alias of “securitysoftware”
SKU: Stock keeping unit. Specifies a specific product after options have been selected. For example, the product is “ArcGIS”, and there may be many SKUs available: ArcGIS Trial Windows 10, ArcGIS Pro Windows 10, ArcGIS Pro Mac OS 10.4+, ArcGIS Pro Linus, etc.
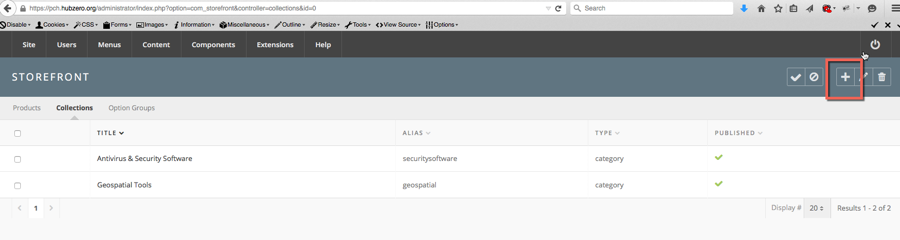
Creating a Collection
- From the Storefront administrator interface , click on the “Collections” tab.
- From the control buttons at the top right of the page, click on the plus icon button to add a new collection.
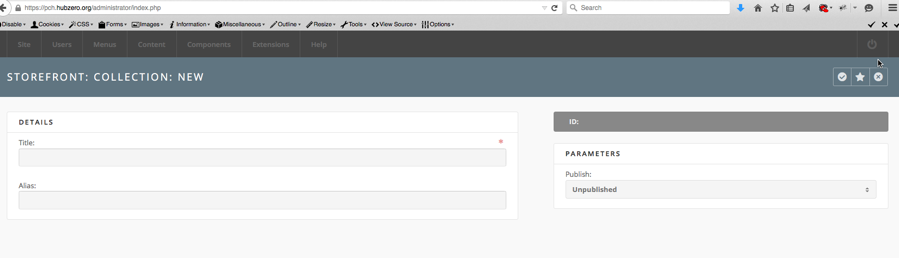
- Enter a collection Title and alias and select it to be “Published”.
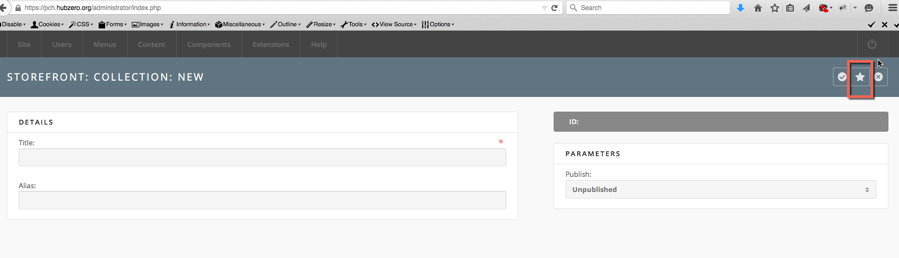
- From the control buttons click on the star icon to “Save and Close”.
Creating a Option Group
- Click on the “Option Groups” tab.
- Click on the control button with the plus icon to create a new Option.
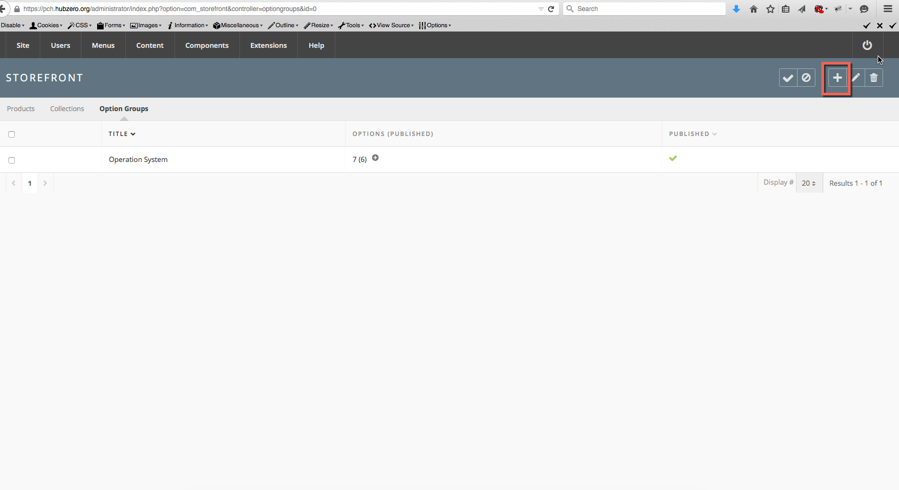
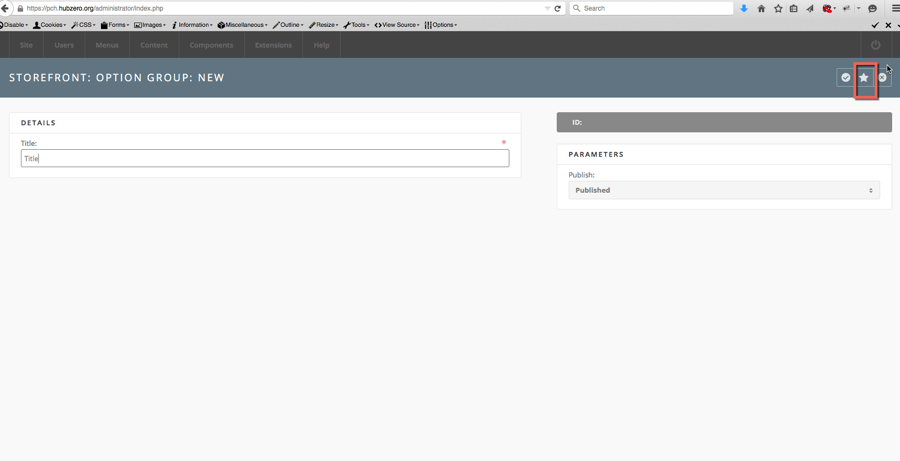
- Enter a Title and select it to be “Published”.
- From the control buttons click on the star icon to “Save and Close”.
Creating Options
- Creating Options
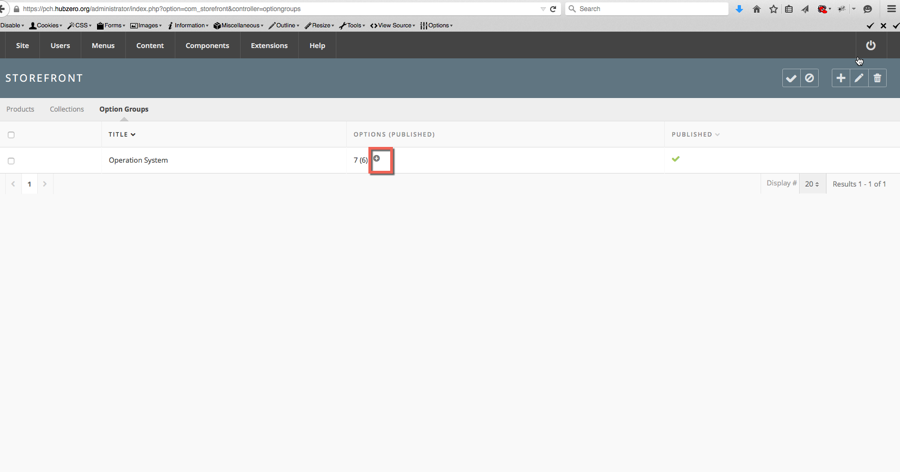
- Click on the round plus icon in the “Option (Published” column) to create a new option.
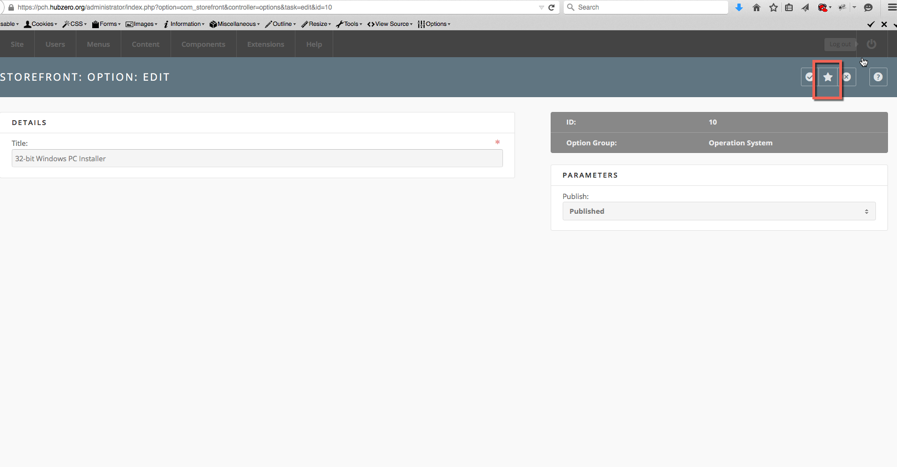
- Enter a Title and select it to be “Published”.
- From the control buttons click on the star icon to “Save and Close”.
- Repeat as needed for additional options.
- Click on the round plus icon in the “Option (Published” column) to create a new option.
Note:Clicking the number in the options column will display the list of all created options that option group.New option may also be added from that page by clicking on the plus icon control button.
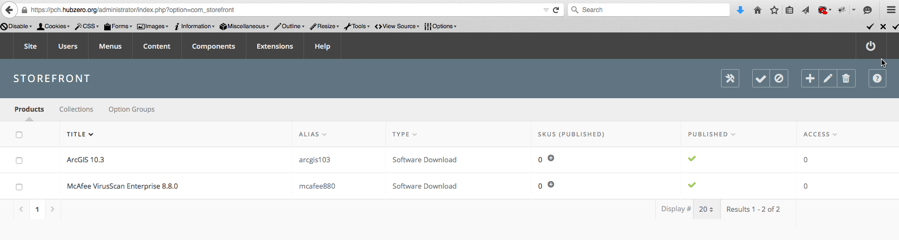
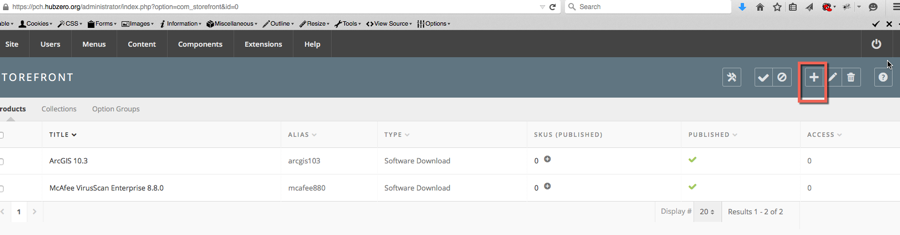
Creating a Product
- Click on the “Products” tab.
- Click on the control button with the plus icon button to create a new product.
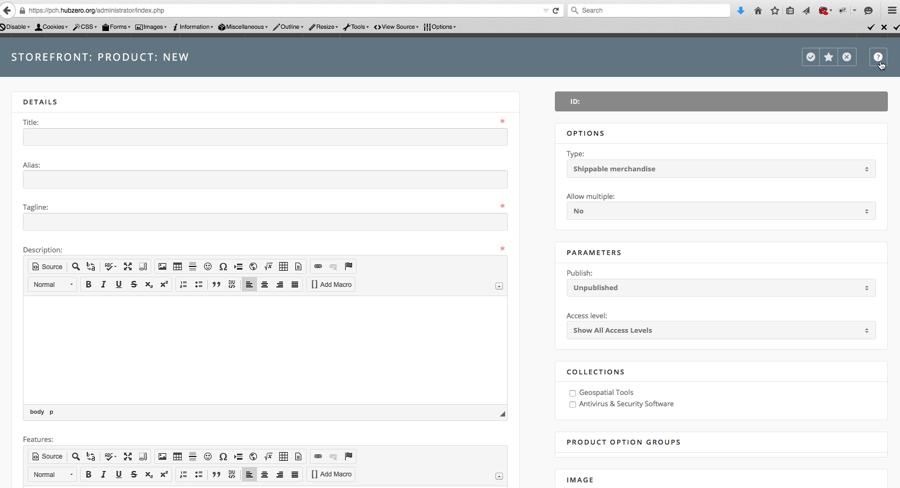
- Complete the required fields and any additional fields. Be sure to select the correct options on the right column of the page.
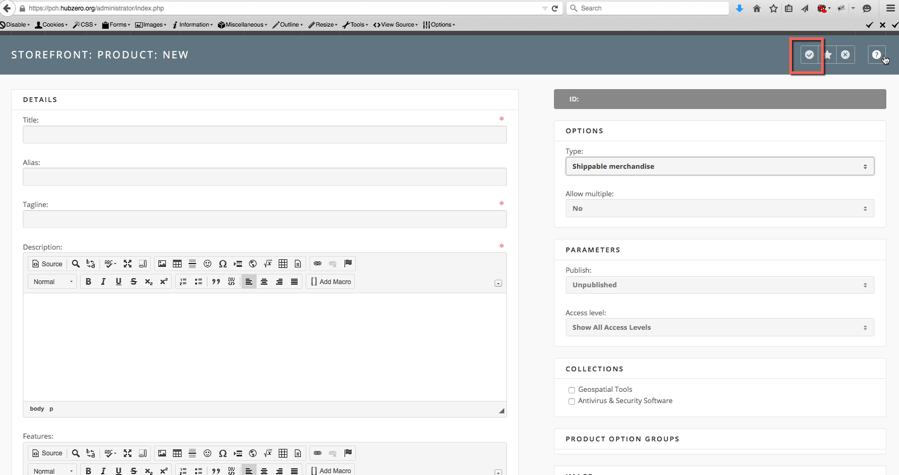
- From the control buttons, click the check icon to “Save” and for the additional options to appear.
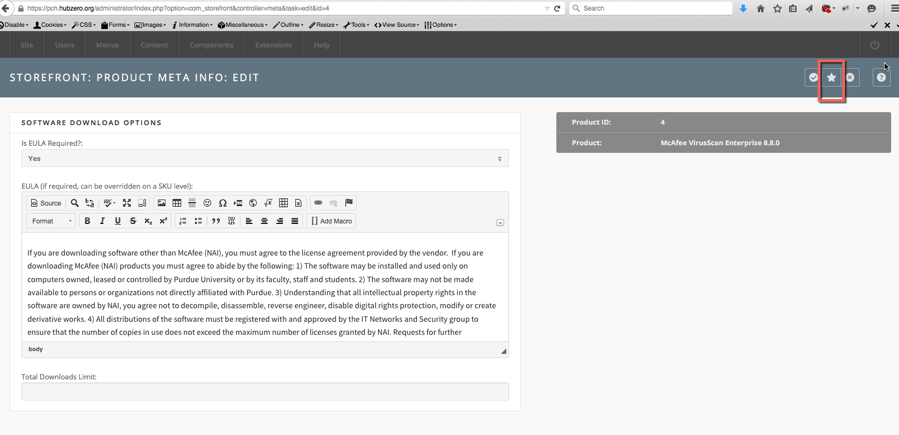
- Click on the “Edit type-related options” for the EULA , etc.
- Enter the desired text and if the EULA is required. When complete, click on the “Save and Close” star from the control buttons to return to the Product page.

- Click on the “Save and Close” star again to save and close the product.
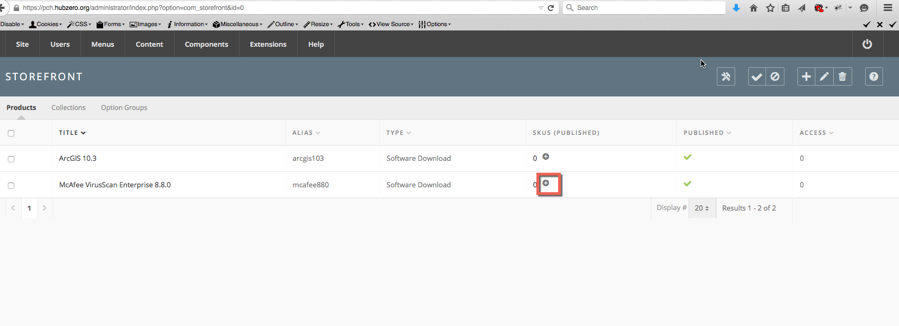
Creating a SKU
- Click on the “Products” tab.
- Click on the control button with the plus icon to create a new SKU.
- Enter a Title and Price.
- Select the individual option created earlier for this specific SKU.
- Enter an override EULA or any additional product options.
- In the right column, select the desired options and select the SKU to be “Published”.
- Specify the download file. **See the section on uploading software files below. Be sure not to include any spaces in, before, after the filename.
- From the control buttons click on the star icon to “Save and Close”
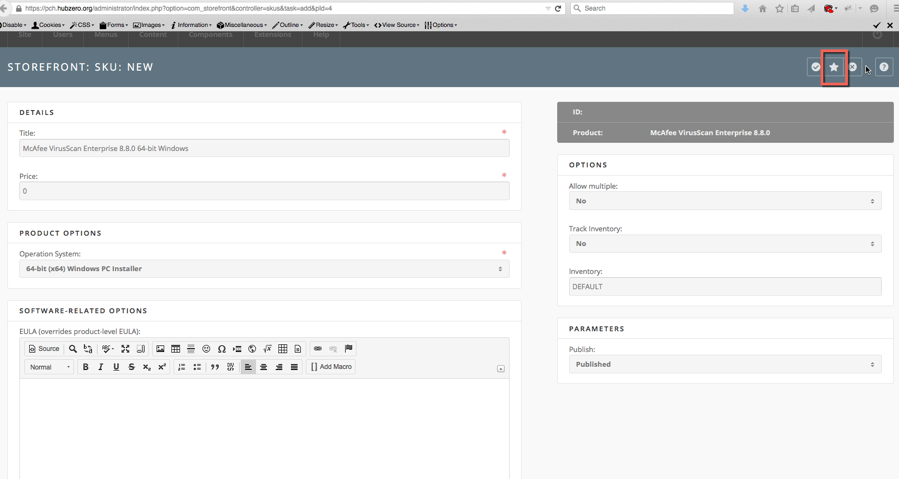
- Repeat as needed for additional options.
Note: Clicking the number in the options column will display the list of all created options that option group. New option may also be added from that page by clicking on the plus icon control button.
Uploading Software Files
- From the Main Menu of hub’s administrator interface: Content -> Media Manager (Click).
- Double click on the “Software Folder”
- Click on “Choose File” below.
- Choose the file.
- Click on the “Start Upload” button.
- The file upload should complete momentarily.
- Return to the Storefront administrator interface.