Registration
Overview
HUBs allow for considerable customization of the registration form for new members. While one HUB may present fields for filling in phone, website, and organization, another may take a more minimal approach and require only a username, password, and email address. This is all configurable.
Making Changes
- First login to the administrative back-end.
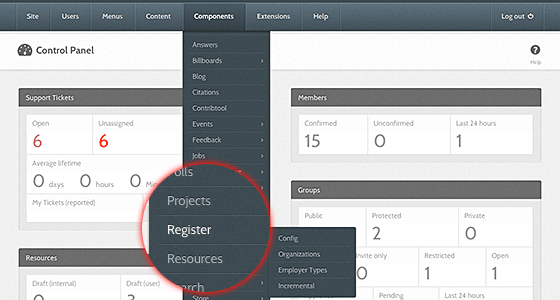
- Once logged in, find “Components” in the main menu bar located toward the top of the page. You should be presented with a drop-down menu containing a list of your installed components.
-
Choose “Register” from the available options.
-
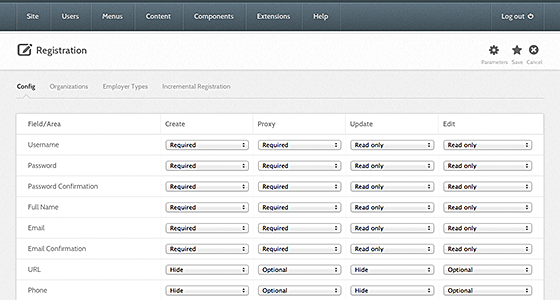
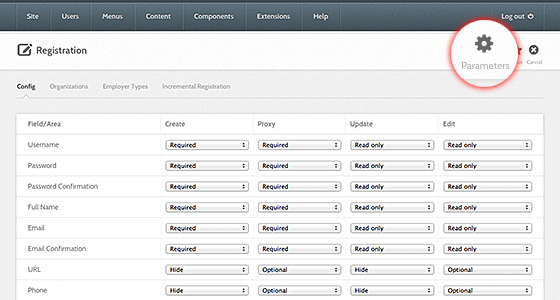
You should now be presented with a table of available user fields and their status for a particular action. This controls what fields the user will see, must fill in (required) or can fill in (optional) depending upon which action or state they are currently in. That is, you can make the username field required for the registration page (“create” column) but may not wish for your users to be able to edit this after creation (“read only” for the “update” and “edit” columns).
- Create column
- What the user sees on the registration page
- Proxy column
- What columns an administrator sees or must fill in when creating an account by proxy (i.e., for someone else)
- Update column
- What fields the user will see and/or must fill in if something has changed with what information is required at registration. An example of this would be if the “citizenship” field was, at one point, optional for registration but is now required. Setting this field to “Required” for the “Update” column will now require logged-in users to fill this information out.
- Edit column
- What fields the user will see and can edit for their user profile
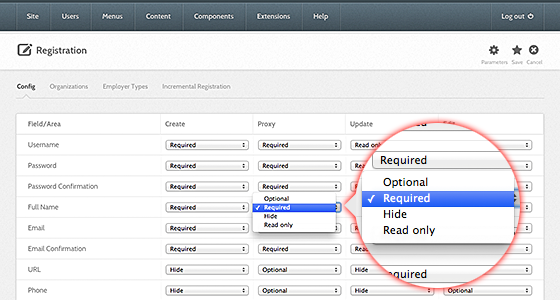
- Field Option Definitions:
- Required = Must fill in
- Optional = Can fill in
- Hide = Not visible
- Read only = Can view but cannot change
-
Once you feel ready to save your changes, scroll back to the top of the page and click “Save” (the icon that looks like a floppy disk) in the upper right portion of the page.
Changes take affect immediately.
Customizing Confirmation Email
All component layouts can be customized through overrides. Except for files that are provided in the "Joomla!" distribution itself, this method for customization eliminate the need for designers and developers to "hack" core files that could change when the site is updated to a new version. Because they are contained within the template, they can be deployed to the Web site without having to worry about changes being accidentally overwritten when your System Administrator upgrades the site. Some emails sent by the system, such as registration confirmations, are component layouts for just this reason of customization.
Quick Overview of Output Overrides
Layout overrides only work within the active template and are located under the /html/ directory in the template.
For example, the overrides for "corenil" are located under /templates/corenil/html/.
It is important to understand that if you create overrides in one template, they will not be available in other templates. For example, "rhuk_milkyway" has no component layout overrides at all. When you use this template you are seeing the raw output from all components. When you use the "Beez" template, almost every piece of component output is being controlled by the layout overrides in the template. "corenil" is in between having overrides for some components and only some views of those components.
The layout overrides must be placed in particular way. Using "Beez" as an example you will see the following structure:
/templates
  /hubbasic
    /html
      /com_register  (this directory matches the component directory name)
        /emails        (this directory matches the view directory name)
          confirm.php (this file matches the layout file name)
The structure for component overrides is quite simple: /html/com_{ComponentName}/{ViewName}/{LayoutName}.php.
Customizing The Confirmation Email
To override the component layout for the registration confirmation email, copy:
/components/com_register/views/emails/tmpl/confirm.php  (the email sent if the user resends a confirmation)
/components/com_register/views/emails/tmpl/create.php  (the email sent upon registration)
to:
/templates/{YourTemplate}/html/com_register/emails/confirm.php
/templates/{YourTemplate}/html/com_register/emails/create.php
If the destination directories do not exist, create them. And then edit the contents of the file(s) you just copied.
See Template Overrides for more information on customizing layouts and CSS.
Confirmation Return URL
By default, members who have just completed the confirmation process will be directed to a "Thank you" page. It is possible, in HUBzero, to change the redirection URL to something else.
Note: This only applies to the initial page the user sees upon confirmation of their email. To customize the return URL members are redirected to upon login see Hub Configuration.
- First login to the administrative back-end.
- Once logged in, find “Components” in the main menu bar located toward the top of the page. You should be presented with a drop-down menu containing a list of your installed components.
-
Choose “Register” from the available options.
-
Once the page has loaded, select the “Parameters” button in the toolbar, found in the upper right-hand portion of the screen. Click it.
-
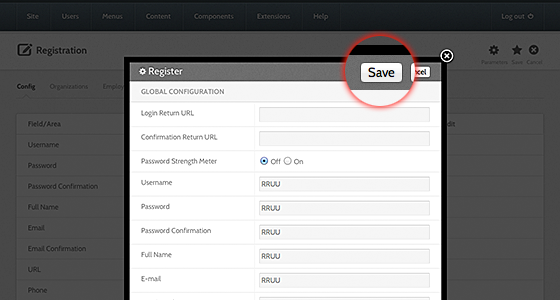
You should now be presented with a pop-up panel for various settings and configurations of your site.
Look for the option titled "Confirmation Return URL". This will most likely be the second item in the list.
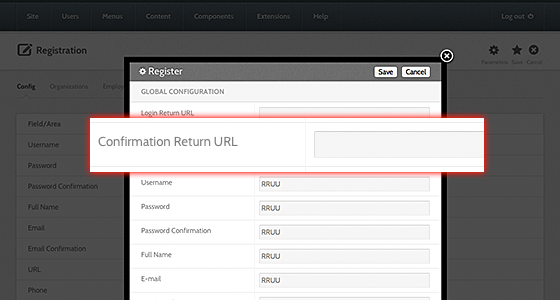
-
Enter in the textbox the URL you wish members to be redirected to and then click "Save".