Creating/Editing
Creating an Article
- First login to the administrative back-end.
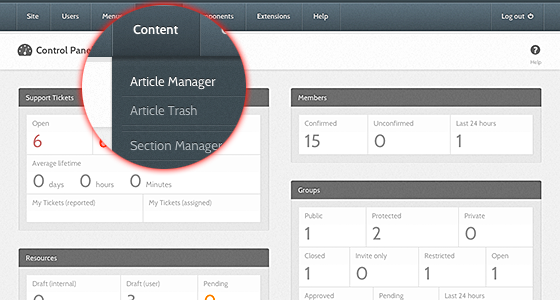
- Once logged in, find “Content” in the main menu bar located toward the top of the page. You should be presented with a drop-down menu containing items such as “Article Manager”, “Article Trash”, etc.
-
Choose “Article Manager” from the available options.
-
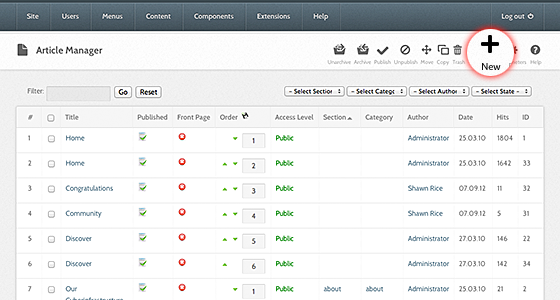
Then click the "New" toolbar button.
-
The New Article screen contains options for categorizing and naming the article, editing content and selecting parameters.
- Enter a title in the "Title" field. This is used when the article title is displayed.
- Enter an alias in the "Alias" field. The alias is used to refer to the title and is important for the URL of the page. If you do not enter anything Joomla! will generate it for you.
- Select a "Section" and "Category" using the drop down menus.
- Choose whether the article is published or not using the "Published" radio buttons.
- Choose whether the article will be displayed by the Frontpage component using the "Front Page" radio buttons.
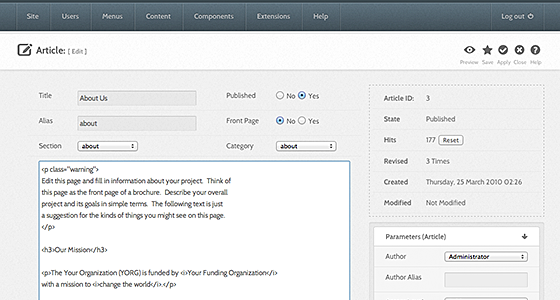
- You may also choose Parameters for the article. Click on each section to view the parameters and change the settings to suit your requirements.
-
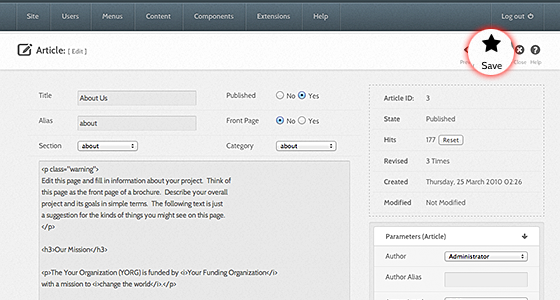
Click the "Save" or "Apply" toolbar button to save your article.
- The "Save" toolbar button will save your changes and return you to the Article Manager screen.
- The "Apply" button will save your changes but leave you in the Article Edit screen.
Editing an Article
- First login to the administrative back-end.
- Once logged in, find “Content” in the main menu bar located toward the top of the page. You should be presented with a drop-down menu containing items such as “Article Manager”, “Article Trash”, etc.
-
Choose “Article Manager” from the available options.
-
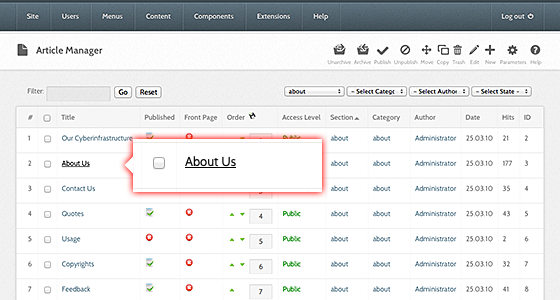
You should now be presented with a list of all the content articles on your site. There are a variety of methods to find the specific entry you wish to edit: you can filter by selecting section, category, author, or even state (published, unpublished, archive). The about page should be in the section “about” and category “about”. You may also search for “About” in the filter search box or scroll to the bottom of the page and navigate your way through the entire list. Once found, click the article title to edit it.
-
You may then edit the page title, content, etc.
-
Once you feel ready to save your changes, scroll back to the top of the page and click “Save” (the icon that looks like a floppy disk) in the upper right portion of the page.
Adding an Image
Images are added to articles using the Editor Buttons below the content editor window in the Edit Article screen. Note: It is possible to insert images using the editor in Joomla! however this feature provides a simple way of inserting images stored in the images/stories directory of Joomla!
- Open the Article for editing either by:
- Click the Content > Article Manager menu item to go to the Article Manager, select the Article and click the Edit toolbar button.
- Clicking the Add New Article button in the Control Panel.
- If logged in to the Front-end, you have appropriate permissions and are viewing the Article you wish to edit: Click the Edit toolbar button.
- Choose where you would like your image placed in the flow of the text by moving the cursor and click the Image editor button at the bottom of the screen.
- The Insert Image screen will open over the top of the Edit Article screen. Choose an image by clicking on it.
- You may also move directory by clicking on the folder icons.
- Use the drop down Directory field to quickly select a directory and click the Up button to go up a directory level.
- Set the image properties as required:
- Image Description: This becomes the alt attribute for the image, an important feature for accessibility and compliance with web standards.
- Image Title: Used for the optional caption and also becomes the title attribute in HTML.
- Align: Sets the image alignment. If left blank the align attribute is not set.
- Caption: Enables the caption which displays the Image Title below the image.
- Click the Insert button to insert the image. The Insert Image screen will close and the image will be displayed in the editor.
- Click the Cancel button to leave the Insert Image screen.
Uploading images using the Insert Image screen
You may also upload new images using the Upload section of the Insert Image screen.
- Click the Browse button to open a file browser.
- Select the image files you wish to upload. Click Open in the file browser to confirm the selection. Note: The file browser style and layout depends on the browser and operating system you are using.
- To remove selected files before uploading click the red icon next to the listed files.
- If you are uploading multiple files in batches you can clear the list of completed files by clicking the Clear Completed button.
- The selected file(s) appear as a list at the bottom of the Insert Image screen. Click Start Upload to begin uploading files.
- When the upload is complete a green tick will appear next to the file.
- You may now select and insert the uploaded image as before.