The Home Page
Setting a Home Page
By default in Joomla! 1.5.x the first page in the main menu is also the default home page for your site.
If you wish to change the current home page to a different article, you must add the desired article to the main menu and make it the first item.
Edit
First login to the administrative back-end.
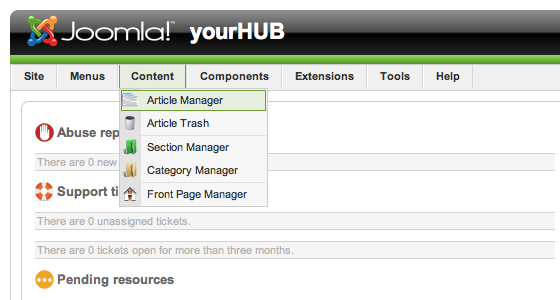
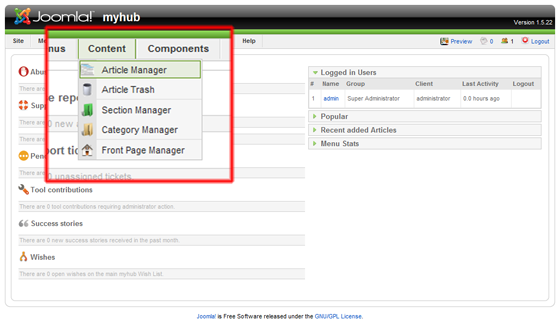
Once logged in, find “Content” in the main menu bar located toward the top of the page. You should be presented with a drop-down menu containing items such as “Article Manager”, “Article Trash”, etc.
Choose “Article Manager” from the available options.
You should now be presented with a list of all the content articles on your site. There are a variety of methods to find the specific entry you wish to edit: you can filter by selecting section, category, author, or even state (published, unpublished, archive). The home page should not be in a section or category (uncategorized). You may also search for the title of your home page in the filter search box or navigate your way through the entire list. Once found, click the article title to edit it.

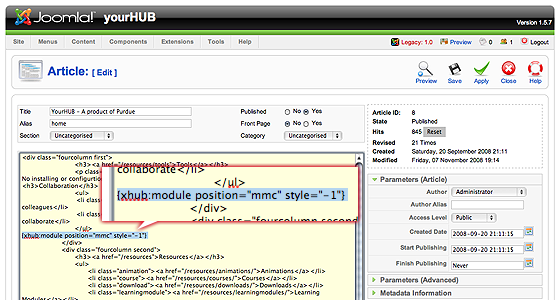
The home page may look a little different than other pages you’ve edited, such as the “About” page. Some of the content you see on the front page doesn’t appear to be in the page you’re editing! This is because the home page embeds modules to output some of its content. This is done with {xhub} tags:
{xhub:module position="frontLeft" style="-1"}
You may assign multiple modules to a position. The {xhub} tag will output all active (published) modules assigned to the position specified. The style attribute determines if the module(s) should be wrapped in a containing div or not and is optional.
Note: The animated banner and welcome message on the front page are also modules and managed through Joomla’s “Module Manager” found under the “Extensions” menu item.
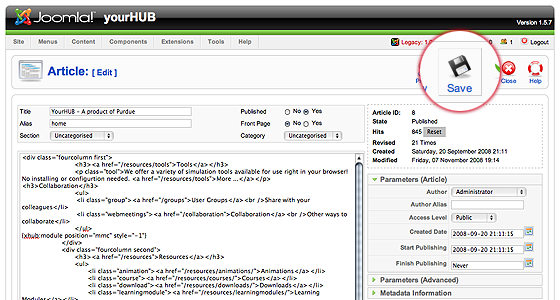
Once you feel ready to save your changes, scroll back to the top of the page and click “Save” (the icon that looks like a floppy disk) in the upper right portion of the page.
Banner
XFlash
This version is no longer supported. Please see the Documentation Archive if you are still interested in learning about the XFlash component.
Sliding Panes (Javascript)
To begin, you'll first start by adding a slide with content.
- Add a slide
- Log into the Joomla! administrative interface for your hub, locationed at
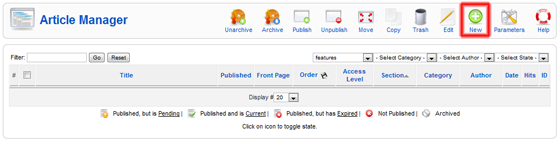
https://yourhubname.org/administrator - Go to the article manager, found under 'Content -> Article Manager'
- Log into the Joomla! administrative interface for your hub, locationed at
-
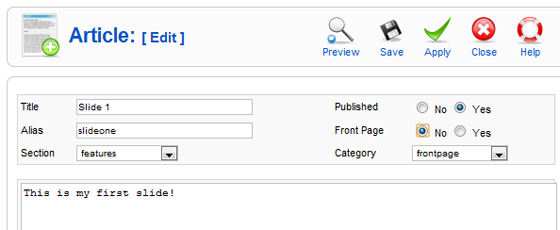
- Click the "New" button to create an Article page - the body of this article will appear as the text on the slide
-
NOTE: If you choose to place the context/text in the background image that we will establish later on in this tutorial, Joomla! will still require that you place some text in this article page. If you run into this problem, you may simply add the following code to your article page such that Joomla! doesn't throw an error while saving your new slide.
Add to the body of the article: "<div style="display:none;">nothing to display</div>"- Also, be sure to add the article to the section/category: features/frontpage (see this page on Sections and Categories for more information on creating this section/category if they do not already exist on your hub). The features/frontpage section and category is the default, your hub can and may be configured differently in the mod_sliding_panes module parameters (see the Modules Documentation for more details).
- Be sure to give the article a unique but memorable alias. This will tell the module what styles from the CSS page to apply to this particular slide
- Save the article you just created
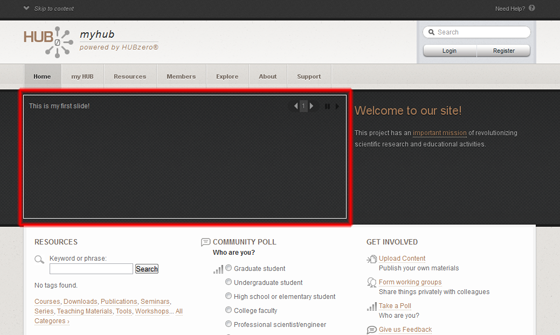
NOTE: The order of the articles defines the order in which the slides appear on the home page.
- Create more articles/slides as necessary
- Arrange the articles in the Features/Frontpage category/section
- You should now see something similar to this on the home page of your hub!
Now that you have a slide with content, the customization work begins.
- Next, you'll add a new slide background image
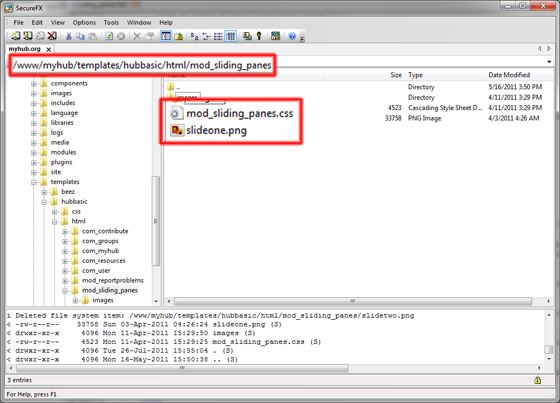
- To do this, you must connect to yourhub.org via SFTP
- Add the slide background (with or without text, as mentioned previously) into the following folder:
/www/yourhub/templates/yourhubtemplate/html/mod_sliding_panes(if the folder doesn't exist, you must create it) - Add the necessary lines to the CSS file mod_sliding_panes.css
- Navigate to
/www/yourhub/templates/yourhubtemplate/html/mod_sliding_panesand open the CSS file (again, if the file does not exist it can be copied from/www/yourhub/modules/mod_sliding_panes/mod_sliding_panes.css)
- Navigate to
-
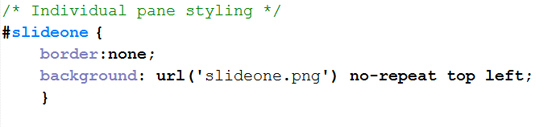
- At the bottom of this file, look for the section labeled:
/* Individual pane styling */ - At a minimum, you should add/modify a new or unused line for your new slide:
#article_alias { background: url('filename.xxx') no-repeat top left; }
Here, 'article_alias' is the article alias, create above, for which you would like the following styles to relate to and 'Filename.xxx' is the image added in aboveNOTE: This also allows you to define other stylistic elements under the same name
Example:#article_alias h3 { margin:40px 0 5px 200px; }
- At the bottom of this file, look for the section labeled:
Welcome
The “welcome” text, typically found to the right of the Flash banner on the home page is a module. To edit this module (or any module):
First login to the administrative back-end.
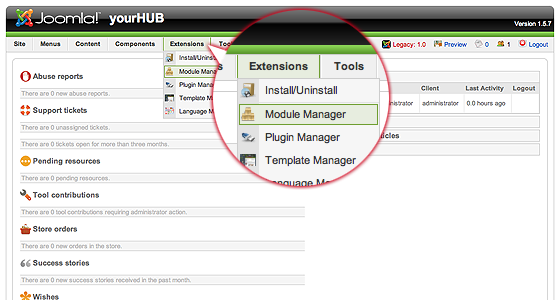
Once logged in, find “Extensions” in the main menu bar located toward the top of the page. You should be presented with a drop-down menu containing items such as “Module Manager”, “Plugin Manager”, etc.
Choose “Module Manager” from the available options.
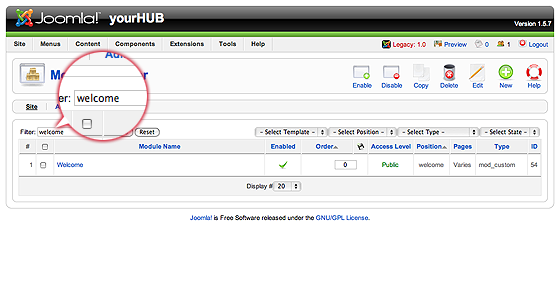
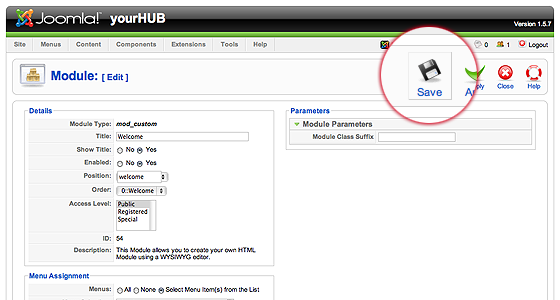
You should now be presented with a list of all the modules installed on your site. There are a variety of methods to find the specific module you wish to edit: you can filter by selecting position, type, or even state (enabled, disabled). The welcome module would be in position “welcome” and of type “mod_custom”. You may also search for “welcome” in the filter search box or scroll to the bottom of the page and navigate your way through the entire list. Since modules are alphabetically sorted by their position by default, “welcome” will most likely be on the last page of results. Once found, click the module name to edit it.
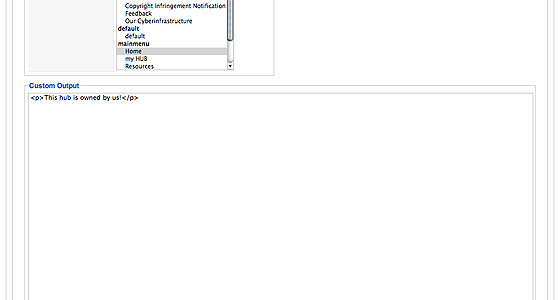
Once in edit mode you will be presented with some options such as the title, position, etc. To edit the actual content of the module, scroll down until you see a large text area called “Custom Output”.

Edit the HTML/text to be outputted.
Scroll back to the top of the page and click “Save” (the icon that looks like a floppy disk) in the upper right portion of the page.
Your changes should now be applied and immediately viewable on the front page.