Article Manager
Creating an Article
First login to the administrative Interface.
Once logged in, find “Content” in the main menu bar located toward the top of the page. You should be presented with a drop-down menu containing items such as “Article Manager”, “Category Manager”, and “Media Manager”.
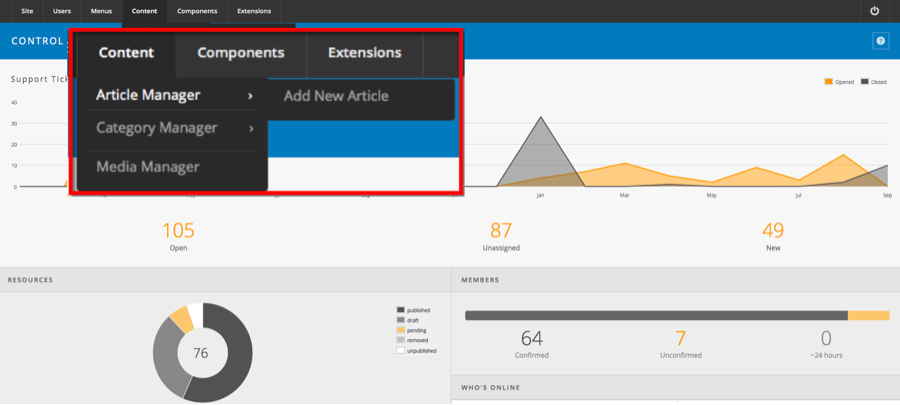
Click on the "Add New Article" link.
The New Article screen contains options for categorizing and naming the article, editing content and selecting parameters.
Enter a title in the "Title" field. This is used when the article title is displayed.
Enter an alias in the "Alias" field (optional). The alias is used to refer to the title and is important for the URL of the page.
Select a "Category" using the appropriate drop down menu.
Select whether the article is "Published”, “Unpublished”, “Archived”, or “Trashed” using the appropriate drop down menu.
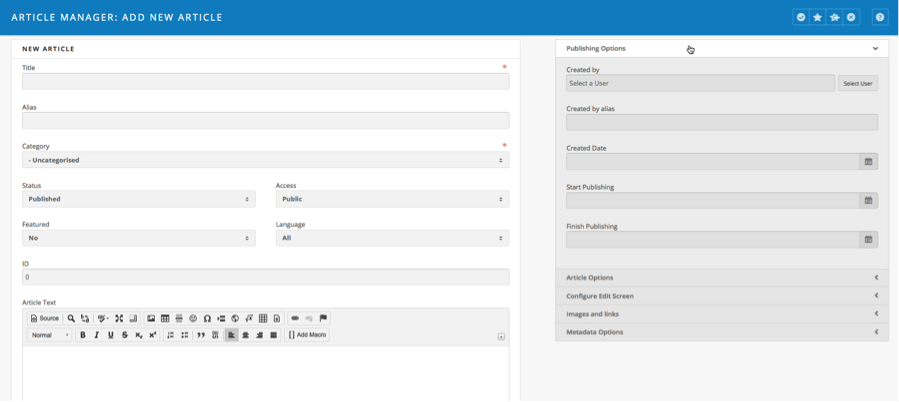
You may also choose Parameters for the article.
Click on each section to view the parameters and change the settings to suit your requirements.
Click the "Save and Close" (star) toolbar button to save your changes and return you to the Article Manager screen.
Alternatively, you may click the "Save" (check in a circle) toolbar button to save your article but leave it open for editing.
Editing an Article
First login to the administrative Interface.
Once logged in, find “Content” in the main menu bar located toward the top of the page. You should be presented with a drop-down menu containing items such as “Article Manager”, “Category Manager”, and “Media Manager”.
Click on the “Article Manager” link.
You should now be presented with a list of all the content articles. There are a few methods to find the specific entry you want to edit. You can filter by state, category, author, etc. or search for the title of the article page. A third option would be to look through the list manually, if you really want.
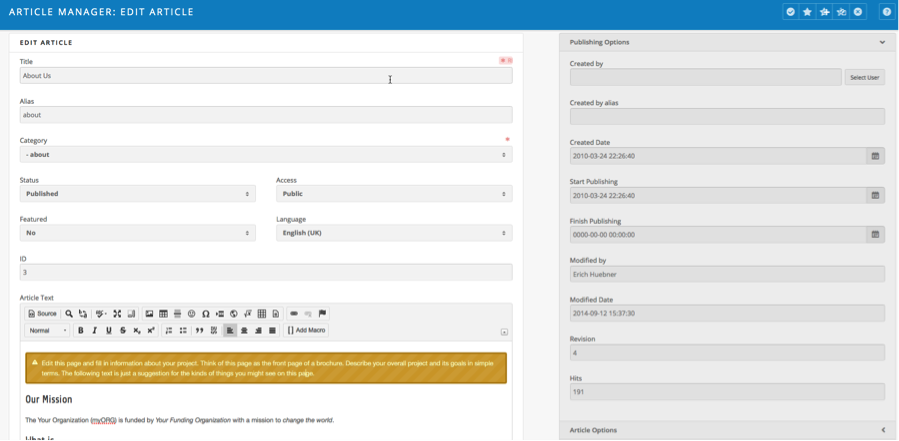
Please find the “About Us” page as we will use that as an example. Once found, click the article title to edit it.
You now should be presented with a page where you can edit the text, title and other page parameters similar to the image below.
When your edits are complete, click the "Save and Close" (star) toolbar button to save your changes and return you to the Article Manager screen.
Alternatively, you may click the "Save" (check in a circle) toolbar button to save your article but leave it open for editing.
Deleting an Article
Moving To The Trash
First login to the administrative Interface.
Once logged in, find “Content” in the main menu bar located toward the top of the page. You should be presented with a drop-down menu containing items such as “Article Manager”, “Category Manager”, and “Media Manager”.
Click on the “Article Manager” link.
Check the box next to the article you want to trash.
Then click "Trash" (trashcan) toolbar button. This will move the article to a trash bin so that it can be retrieved later if needed. It does not permanently delete the article.

To retrieve the trashed article, select the status filter of the article list to “trashed”. This will show all the articles with a status of “trashed”. Click on the article’s title and choose the status that you require – typically “published”.
Permanently Deleting
If you want to make sure the Article is completely gone from the system (so no further roll back is available), select the status filter of the article list to “trashed”. This will show all the articles with a status of “trashed”.
Check the box next to the article you want to delete.
Click the "Empty Trash" (trashcan) toolbar button to remove the article permanently. Recovery is not possible after this action.
Note: Articles in the Trash Manager are not the same as Archived Articles..
Check the box next to the article you want to unarchive.